In this article, using the MudBlazor UI component we will implement a CRUD sample in Blazor WebAssembly.
Create A Blazor WebAssembly Sample Application:
To accomplish our goal let's create a sample Blazor WebAssembly application.
Install MudBlazor Package:
Package Manager:
Install-Package MudBlazor -Version 5.0.7
.Net CLI
dotnet add package MudBlazor --version 5.0.7
MudBlazor Setup:
Add Mudblazor namespace into the '_Imports.razor'
_Imports.razor:
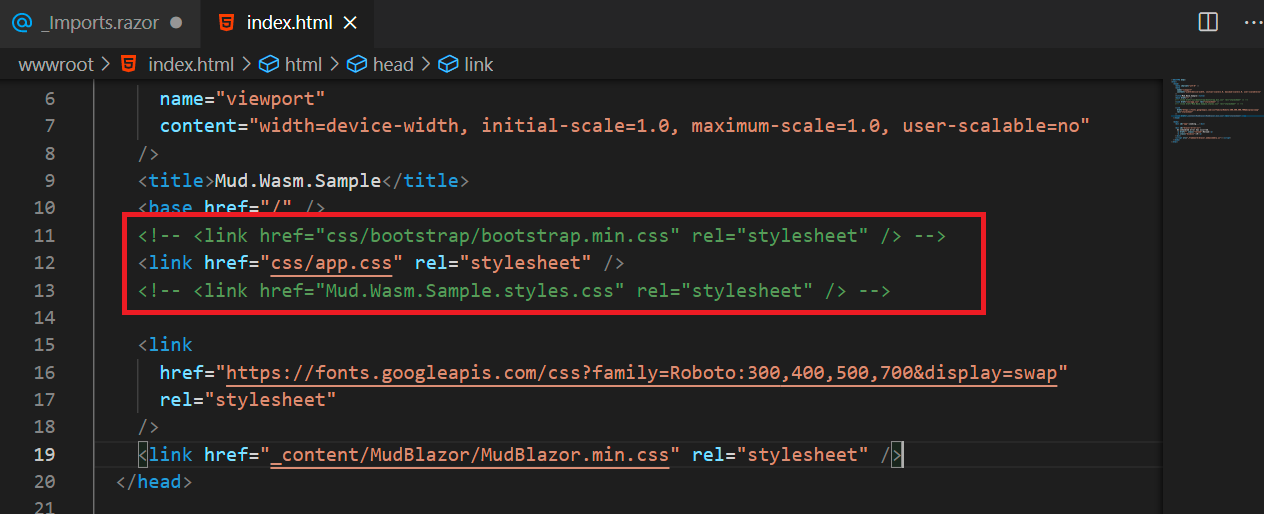
@using MudBlazorAdd the below CSS files inside of the head tag in 'index.html'.
wwwroot/index.html:
<link href="https://fonts.googleapis.com/css?family=Roboto:300,400,500,700&display=swap" rel="stylesheet" />
<link href="_content/MudBlazor/MudBlazor.min.css" rel="stylesheet" />
Remove the CSS files like 'bootstrap.min.css' and '{your_applicationname}.style.css'.
wwwroot/index.html:
<script src="_content/MudBlazor/MudBlazor.min.js"></script>
Register MudBlazor service in 'Program.cs'
Program.cs:
builder.Services.AddMudServices();
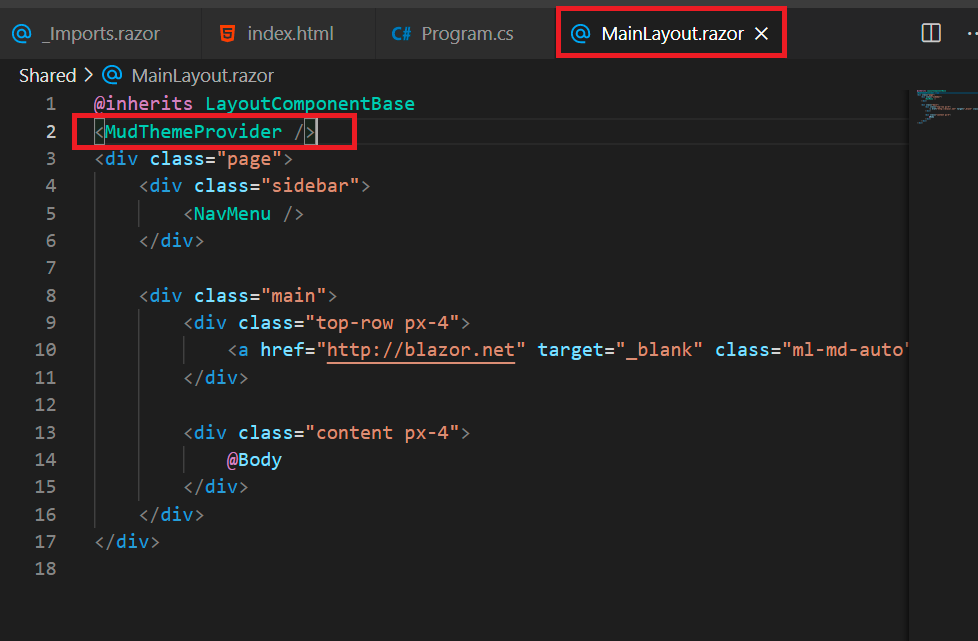
Add 'MudThemeProvider' component in 'MainLayout.razor'.
Shared/MainLayout.razor:
Add MudAppBar Component:
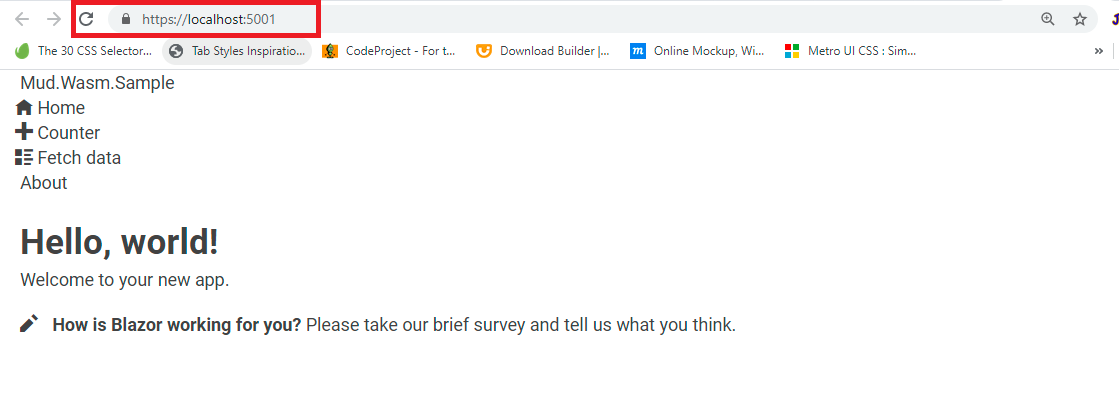
Let's make our application a little pretty by adding the AppBar.
Shared/MainLayout.razor:
@inherits LayoutComponentBase
<MudThemeProvider />
<div class="page">
    <MudAppBar Color="Color.Success">
        <MudText Typo="Typo.h4" class="px-4">MudBlazor Wasm Sample</MudText>
    </MudAppBar>
    <div class="main">
        <div class="content px-4">
            @Body
        </div>
    </div>
</div>
- (Line: 4-6) Used 'MudAppBar' and 'MudText' components.
Rest API:
In the blazor webassembly application, displaying data, storing or updating data, or removing data is carried out by Rest API. So for in our demo application, we will consume a free rest API like 'https://jsonplaceholder.typicode.com/posts'. But there are limitations with these free rest API's they won't support creating or deleting data. So in our demo for creating, update and delete operations we are going to pretend like we really calling API.
If you have knowledge on creating rest API, then it will nice be to create a sample API with all CRUD operations and then use that API in the blazor webassembly application.
Different HttpClient Techniques:
In this demo, we are going to use the 'Type Client' technique. The 'Type Client' technique means creating a specific class to an API domain, in that class we will implement all API calls logic like fetching, updating, and deleting. So each API domain will have an individual POCO class in 'Type Client'.
Install Http Extension Package:
To use the 'Type Client' technique we need to register our POCO class in the start file using the 'AddHttpClient' service. The 'AddHttpClient' service bundled with the HTTP extension library, so need to install the library mention below.
Package Manager Command:
Install-Package Microsoft.Extensions.Http -Version 5.0.0
.Net CLI Command:
dotnet add package Microsoft.Extensions.Http --version 5.0.0
Typed HttpClient Basic Setup:
Create API payload type. So let's create a folder like 'Models' and add a class like 'Post'.
Models/Post.cs:
namespace Mud.Wasm.Sample.Models
{
    public class Post
    {
        public int Id { get; set; }
        public string Title { get; set; }
        public string Body { get; set; }
    }
}
Add the 'Post.cs' namespace into the '_Import.razor'._Import.razor:
@using Mud.Wasm.Sample.ModelsNow let's set up our Typed HttpClient. So let's create a folder like 'ApiClient' and add a file like 'JsonPlaceHolderClient.cs'.
ApiClient/JsonPlaceHolderClient.cs:
using System.Net.Http;

namespace Mud.Wasm.Sample.ApiClient
{
    public class JsonPlaceHolderClient
    {
        private HttpClient _httpClient;
        public JsonPlaceHolderClient(HttpClient httpClient)
        {
            _httpClient = httpClient;
        }
    }
}
Add the 'JsonPlaceHolderClient.cs' into the '_Import.razor'._Import.razor:
@using Mud.Wasm.Sample.ApiClientRegister our 'JsonPlaceHolderClient' with our API domain.
Program.cs:
builder.Services.AddHttpClient<JsonPlaceHolderClient>(client => {
	client.BaseAddress = new Uri("https://jsonplaceholder.typicode.com");
});
Read Operation:
Let's fetch data from the API and then bind using the MudBlazor components. Let's create a method in our typed client class to fetches data from the API.
ApiClient/JsonPlaceHolderClient.cs:
public async Task<List<Post>> GetAllPost()
{
	return await _httpClient.GetFromJsonAsync<List<Post>>("/posts");
}
- Here 'GetFromJsonAsync<T>()' method invokes the API, on receiving response it automatically deserializes the JSON response to the specified type.
Index.razor:(Html Part)
@page "/"
@inject JsonPlaceHolderClient _jsonPlaceHolderClient;

<MudPaper Width="100%">
    <MudContainer Style="padding-top: 5%;">
        @if (showLoader)
        {
            <MudProgressCircular Color="Color.Primary" Style="height:70px;width:70px;" Indeterminate="true" />
        }
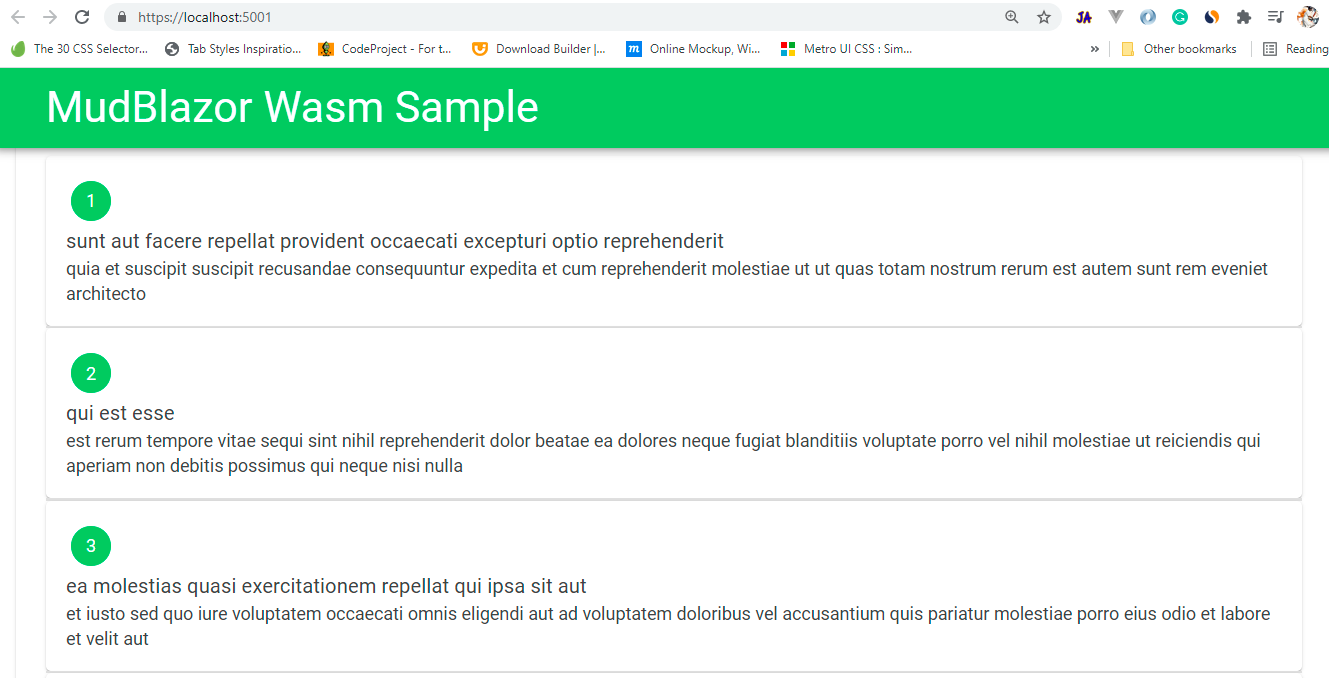
        @foreach (var post in allposts)
        {
            <MudCard>
                <MudCardContent>
                    <MudChip Color="Color.Success">@post.Id</MudChip>
                    <MudText>@post.Title</MudText>
                    <MudText Typo="Typo.body2">@post.Body</MudText>
                </MudCardContent>
            </MudCard>
            <MudDivider />
            <MudDivider />
        }
    </MudContainer>
</MudPaper>
- (Line: 4-5) Used 'MudPaper' and 'MudContainer' as parent components of our page.
- (Line: 6-9) Using 'MudProgressCircular' component displaying loading spinner conditionally.
- (Line: 12-18) Used 'MudCard' component to bind the API response.
- (Line: 19) Used 'MudDivider' to make a nice separation between each 'MudCard'.
@code{
    private List<Post> allposts = new List<Post>();
    bool showLoader = false;

    protected override async Task OnInitializedAsync()
    {
        showLoader = true;
        allposts = await _jsonPlaceHolderClient.GetAllPost();
        showLoader = false;
    }
}
- The 'OnInitializedAsync' is a page life cycle method where we call our API. The 'showLoader' boolean flag enabled before invoking API and then once the response received disabled 'showLoader' flag.
Create Operation:
Initially mentioned that third-party API only supports fetching data and doesn't support any create, update, or delete operation. But we pretend our API works and we will implement the logic.
Let's add a new method for in typed client class(JsonPlaceHolderClient)
ApiClient/JsonPlaceHolderClient.cs:
public async Task<Post> CreateOrUpdatePost(Post newPost)
{
	#region  for-real-appliation-development
	// var response = await _httpClient.PostAsJsonAsync<Post>("/create", newPost);
	// return await response.Content.ReadFromJsonAsync<Post>();
	#endregion
	#region  dummy-implementation-for-demo
	await Task.FromResult(0);
	return newPost;
	#endregion
}
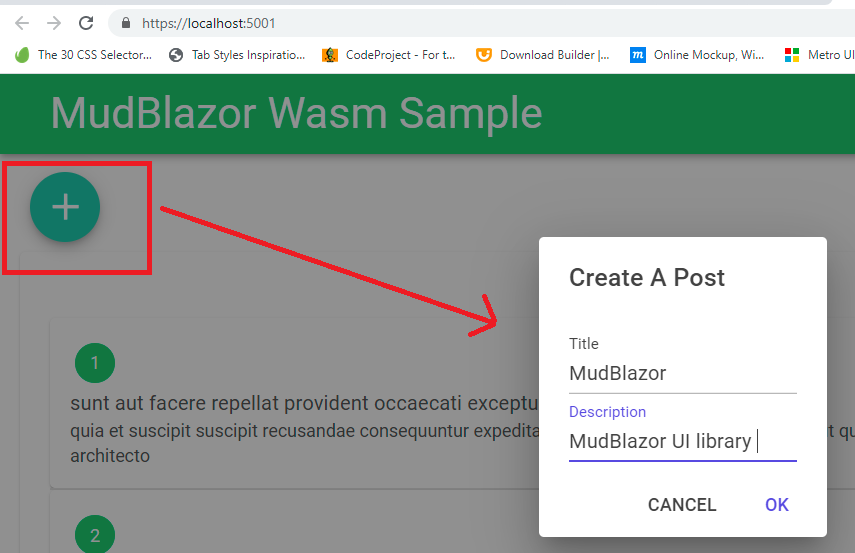
Now we will create a form on a popup.MudBlazor provides us a popup component that is the 'MudDialog' component.So to use the MudBlazor dialog component first we need to render the 'MudDialogProvider' component in 'MainLayout.razor'.
For the dialog component, let's create a new blazor component like 'AddOrUpdateDialog.razor'.
Pages/AddOrUpdateDialog.razor:(Html Part)
<MudDialog>
    <DialogContent>
       <MudTextField T="string" Label="Title" @bind-Value="post.Title"/>
       <MudTextField T="string" Label="Description" @bind-Value="post.Body"/>
    </DialogContent>
    <DialogActions>
        <MudButton OnClick="Cancel">Cancel</MudButton>
        <MudButton Color="Color.Primary" OnClick="Submit">Ok</MudButton>
    </DialogActions>
</MudDialog>
- Here rendered 'MudDialog' component that contains text fields and action buttons.
@code{
    [CascadingParameter] MudDialogInstance MudDialog { get; set; }

    [Parameter]
    public Post post{get;set;} = new Post();

    private void Cancel(){
        MudDialog.Cancel();
    }

    private void Submit(){
        MudDialog.Close(DialogResult.Ok<Post>(post));
    }
}
- The 'MudDialogInstance' is cascading property that provides us control over the pop-up like closing and canceling operations.
- The 'post' is the 'Parameter' property whose value received from the component that invokes this dialog component.
- The 'DialogResult.Ok<T>()' instance helps to return the response data from the dialog component.
Pages/Index.razor:(Html Part)
@page "/"
@inject JsonPlaceHolderClient _jsonPlaceHolderClient;
@inject IDialogService _dialogService;
<div style="padding-top: 5%;">
<MudFab Color="Color.Tertiary" Icon="@Icons.Material.Filled.Add" Size="Size.Large" IconSize="Size.Large" Class="ma-2"
    @onclick="(e => Create())"
    />
</div>

<MudPaper Width="100%">
<!-- code hidden for display purpose -->
</MudPaper>
- (Line: 3) The 'IDialogService' injected helps to invoke the MudBlazor dialog components.
- (Line: 5-8) The 'MudFab' button added. On clicking this button it invokes 'Create()'.
@code{

    private async Task Create()
    {
        var parameters = new DialogParameters();
        parameters.Add("post", new Post());
        var dialog = await _dialogService.Show<AddOrUpdateDialog>("Create A Post", parameters).Result;

        if (dialog.Data != null)
        {
            Post newPost = dialog.Data as Post;

            await _jsonPlaceHolderClient.CreateOrUpdatePost(newPost);

            #region logic-only-for-demo
            int lastRecordId = allposts.OrderByDescending(_ => _.Id).Select(_ => _.Id).FirstOrDefault();
            newPost.Id = lastRecordId + 1;
            #endregion
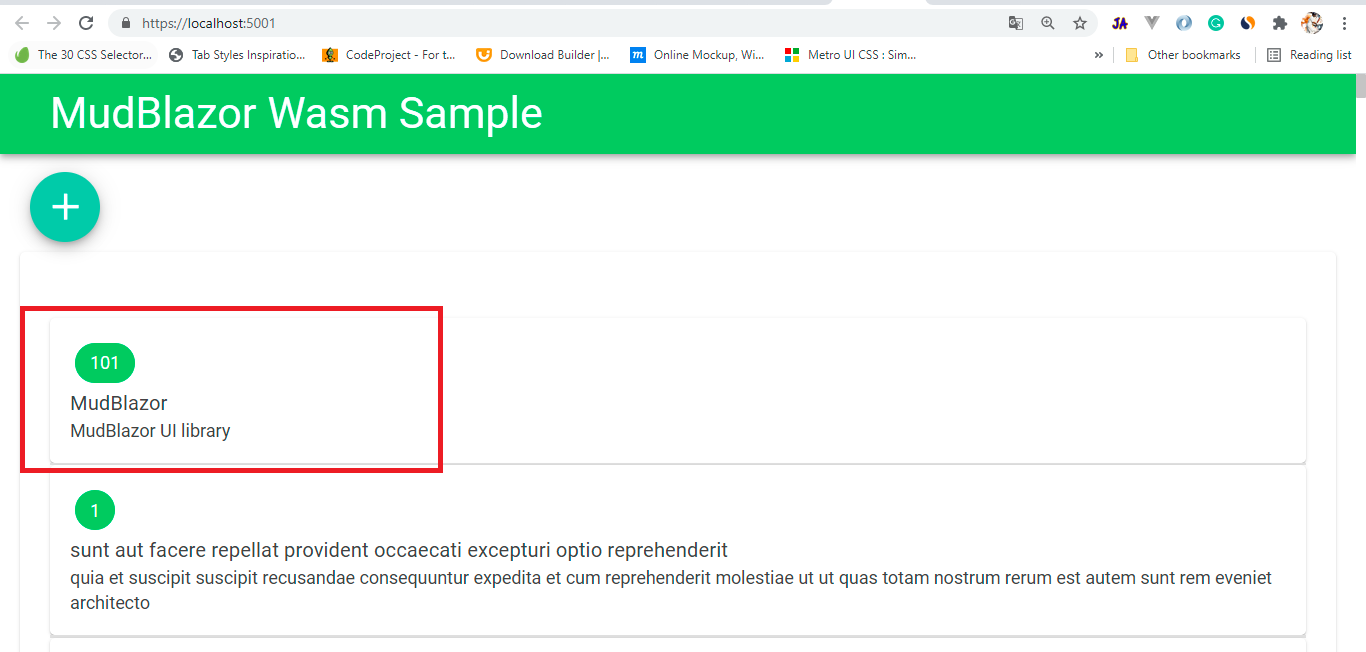
            allposts.Insert(0, newPost);
        }
    }
}
- (Line: 5-6) Preparing 'DialogParameters'. Passing empty 'Post' instance as one of the 'DialogParameters'. This helps to pass data from our 'Index.razor' component to 'AddOrUpdateDialog.razor'.
- (Line: 7) Opens the 'AddOrUpdateDialog' component. The first parameter is heading for our dialog component, the second parameter is 'DialogParameter'.
- (Line: 9) Checking the data from the Dialog component.
- (Line: 13) Invoking the method that invokes API call.
Update Operation:
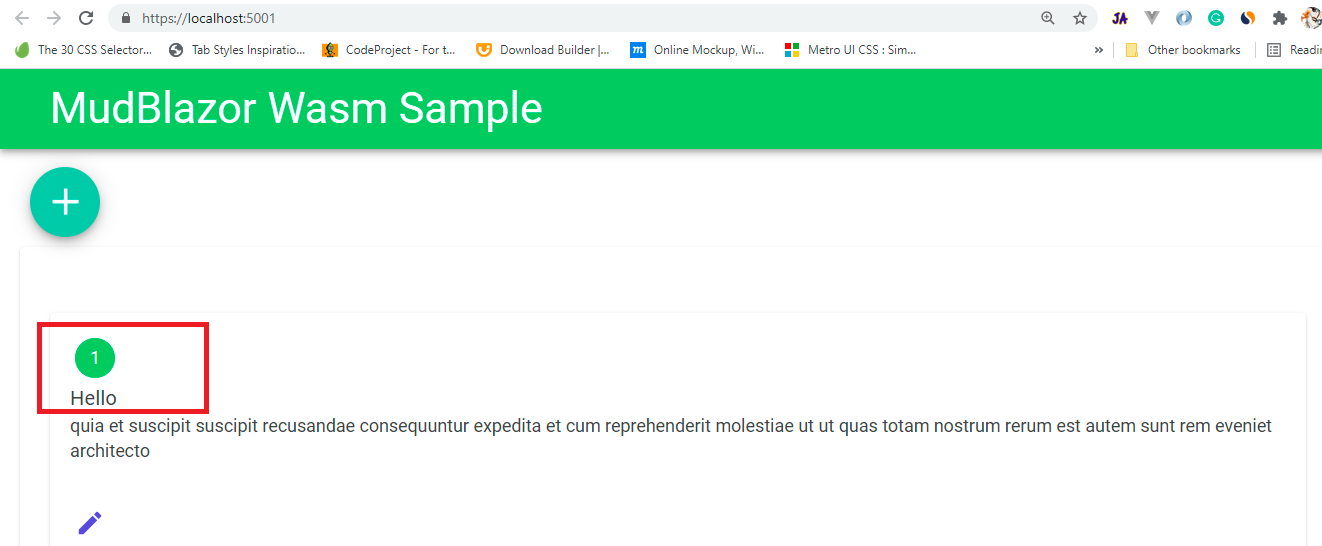
Now let's add an edit button to each post item card. To that edit button register a callback event method that contains logic for updating the post item.
Pages/Index.razor:(Html Part)
<MudCard>
	<!-- code hidden for display purpose -->
	<MudCardActions>
		<MudIconButton OnClick="(e => Update(post.Id))" Icon="@Icons.Material.Filled.Edit" Color="Color.Primary"></MudIconButton>
	</MudCardActions>
</MudCard>
Pages/Index.razor:(Code Part)
private async Task Update(int id)
{
	var post = allposts.Where(_ => _.Id == id).FirstOrDefault();

	var parameters = new DialogParameters();
	parameters.Add("post", post);
	var dialog = await _dialogService.Show<AddOrUpdateDialog>("Update A Post", parameters).Result;

	if(dialog.Data != null)
	{
		var dailogData = dialog.Data as Post;
		var updatedPost = await _jsonPlaceHolderClient.CreateOrUpdatePost(dailogData);

		allposts = allposts.Where(_ => _.Id != id).ToList();
		allposts.Insert(0,updatedPost);
	}
}
Delete Operation:
Now let's add a new method to our typed client(JsonPlaceHolderClient) for invoking delete API.
ApiClient/JsonPlaceHolderClient.cs:
public async Task DeletePost(int id)
{
	#region  for-real-application
	// await _httpClient.DeleteAsync($"delete?id={id}");
	#endregion

	#region dummy-implementation-for-demo
	await Task.FromResult(0);
	#endregion
}
Now add the 'Delete' button for every item of the 'Post'. Register the 'Delete' button with a callback method that contains all logic for 'post' deletion.Pages/Index.razor:(Html Part)
<MudCard>
	<MudCardActions>
		<MudIconButton OnClick="(e => Update(post.Id))" Icon="@Icons.Material.Filled.Edit" Color="Color.Primary"></MudIconButton>
		<MudIconButton OnClick="(e => Delete(post.Id))" Icon="@Icons.Material.Filled.Delete" Color="Color.Primary"></MudIconButton>
	</MudCardActions>
</MudCard>
Pages/Index.razor:(Code Part)
private async Task Delete(int id)
{
	bool? result = await _dialogService.ShowMessageBox(
		"Warning",
		"Deleting can not be undone!",
		yesText:"Delete!", cancelText:"Cancel");

	if(result != null && result == true)
	{
	  await _jsonPlaceHolderClient.DeletePost(id);
	  allposts = allposts.Where(_ => _.Id != id).ToList();
	}
}
- Here we use a warning message dialog box before deleting the record using 'DialogService'.
Video Session:
Support Me!
Buy Me A Coffee
PayPal Me
Wrapping Up:
Hopefully, I think this article delivered some useful information about using the MudBlazor library in the Blazor WebAssembly application. I love to have your feedback, suggestions, and better techniques in the comment section below.





Great
ReplyDeleteVery helpful - THANKS a lot!
ReplyDelete