
AntiForgeryToken is a security token generated by the .Net Core web application, which is used to validate a post request to guard against Cross-Site Request.
Automatic AntiforgeryToken Generation:
AntiforgeryToken used for validating the post request. So if we access an MVC or RazorPages view which contains the form element with an attribute 'method="post"' then the view gets rendered with an automatic generated AntiforgertyToken value, which gets injected into the form as hidden input field.
Let's test automatic AntiforgeryToken generation as follow:
Controllers/TestController.cs:
using Microsoft.AspNetCore.Mvc;
namespace AntiforgeryTokeSample.Mvc.Controllers
{
    public class TestController : Controller
    {
        public IActionResult Index()
        {
            return View();
        }
    }
}
Let's create a view for the above index action method as follows:Views/Test/Index.cshtml:
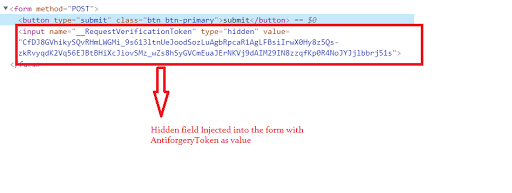
<form  method="POST">
	<button type="submit" class="btn btn-primary">submit</button>
</form>
Here Index.cshtml view contains a form element with method="post" attribute. If you don't specify the method="post" attribute AntiforgertyToken never gets created automatically.
Note:-
So method attribute with post value is mandatory for autogeneration of AntiforgeryToken.
Now run the application and access the view we create above and go to browser inspect element window and we can observe the Antiforgery token injected into the form as below.
In general, the form element will be decorated with the 'action' attribute which has the post action method Url. The tricky part here if we use the 'action' attribute on a form element, the AntiforgeryToken will not be generated automatically.
To test 'action' attribute on form element update the Index.cshtml as follows
Views/Test/Index.html:
<form action="save" method="POST">
	<button type="submit" class="btn btn-primary">submit</button>
</form>
Updated form with 'action' attribute(action method value to post action URL, since we haven't created any post action method for testing our scenario pass any text value 'action' attribute as value).

@Html.AntiForgeryToken Tag Helper To Generate Explicitly:
In razor page, views Antiforgery token generated explicitly by using @Html.AntiForgeryToken(), tag helper.
Let's test using HTML tag helper as below:
Views/Test/Index.cshtml:
<form>
	@Html.AntiForgeryToken()
	<button type="submit" class="btn btn-primary">submit</button>
</form>
Now run the application and check the hidden field inside form with Antiforgery token as value as below

Controllers/TestController.cs:
[HttpPost]
[ValidateAntiForgeryToken]
public IActionResult Save()
{
	return Content("Executed Post Save action method");
}
Here we created a sample MVC POST action method which decorated with the 'HttpPost' attribute(makes post method) and 'ValidateAntiForgeryToken' attribute(to secure action method).Now update the view to navigate to this newly created post method on clicking the submit button on the page as follows.
Views/Test/Index.cshtml:
<form method="POST" action="save">
	@Html.AntiForgeryToken();
	<button type="submit" class="btn btn-primary">Submit</button>
</form>
Form element 'action' attribute specifies the post URL, on hitting submit button form data get posted.
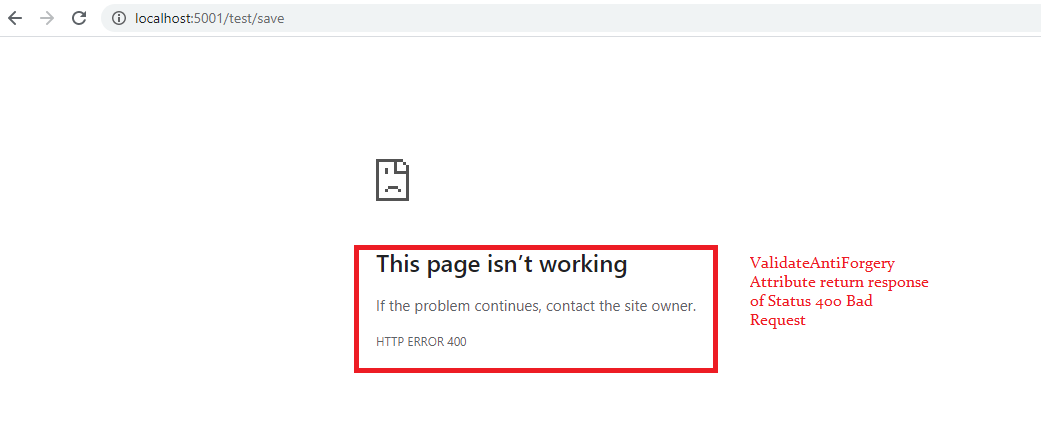
On posting data, the 'ValidateAntiForgeryToken' attribute reads the hidden input element value(AntiforgeryToken) and then validates token. If the token signature qualifies, the server allows the post request to execute, if the token is not qualified(tampered or modified) then the server halts the post request and return a response as Bad Request of status 400(Http Status Code for Bad Request).
Let's run the application and click on the submit button and observe the response below.
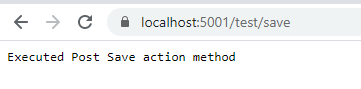
By looking at this response from the post action method we can confirm that our Antiforgery Token gets successfully validated.
Let's test a failure case now, so remove the Antiforgery token from the Form element.
Views/Test/Index.html:
<form method="POST" action="save">
	<button type="submit" class="btn btn-primary">Submit</button>
</form>
Now run the application and click on the submit and observe the response below.
IAntiforgery Interface To Generate Explicitly:
By using 'Microsoft.AspNetCore.Antiforgery.IAntiforgery' interface, we able to generate Antiforgery token explicitly.
Views/Test/Index.cshtml:
@inject Microsoft.AspNetCore.Antiforgery.IAntiforgery _antiforgery
@{
   string tokenValue = _antiforgery.GetAndStoreTokens(Context).RequestToken;
}

<div>
    <form method="POST" action="save">
        <input type="hidden" name="__RequestVerificationToken"
        value="@tokenValue" />
        <button type="submit" class="btn btn-primary">Submit</button>
    </form>
</div>
- Using '@inject' directive injecting the 'Microsoft.AspNetCore.Antiforgery.IAntiforgery'.
- 'GetAndStoreTokens(Context)' method generate the token. The reason to pass request context as an input parameter to 'GetAndStoreTokens', to fetch value already exists Antiforgery token in Antiforgery cookie, if no cookie value then it will generate new token and store to a cookie, as well as returns it if needed.

- Token was assigned to a manually added hidden input element in the form. Here hidden input element name should be like "__RequestVerificationToken" if you assign any other name to hidden field the .Net Core application can't read the Antiforgery token value. So "__RequestVerificationToken" is the default name for input hidden element which stores Antiforgery token value.
- In two scenarios we can give a custom name to a hidden field like:-
- Case 1 - Override Antiforgery service configuration in Startup.cs file(discuss in detail later steps)
- Case 2 - Instead of posting form data as MVC page, post the form data to API call by fetching form data using javascript, but in this case, Antiforgery token need to send as the custom header in the API call (discuss in detail in later steps)
<input type="hidden" name="myTokenField"
        value="@tokenValue" />
Now run the application and click on submit button and you can see the response as below
ValidateAntiForgeryToken Vs AutoValidateAntiForgeryToken:
- Now we know using ValidateAntiForgeryToken attribute on the POST action method to avoid cross-site attacks.
- But adding ValidateAntiForgeryToken filter attribute on every POST action method in action method will be tedious and there are high chances may forget to add on few POST action methods unknowingly which may lead application vulnerability.
- At this point in time, we think like adding the ValidateAntiForgery Token filter attribute at the controller level makes our application secured. But adding on controller level leads to fatal error for 'GET', 'OPTION' action method inside the controller, because these methods don't need of the AntiforgeryToken.
- So we need to resolve this issue by adding in the filter like 'IgnoreAntiForgeryToken' on 'GET', 'OPTION' action methods.
Controllers/TestController.cs:
[ValidateAntiForgeryToken]
public class TestController : Controller
{
	[HttpGet]
	public IActionResult Index()
	{
		return View();
	}

	[HttpPost]
	public IActionResult Save()
	{
		return Content("Executed Post Save action method");
	}
}
Added ValidateAntiForgeryToken filter attribute at the controller. Now try to access the 'Index' action method which is 'GET' and the response will be Bad Request of HTTP Status code 400.
So to avoid this issue need to use 'IgnoreAntiForgeryToken' filter attribute on Http Get Method as below
Controllers/TestController.cs:(Update Index Action method):
[IgnoreAntiforgeryToken]
[HttpGet]
public IActionResult Index()
{
	return View();
}
Now if we access the index action method we won't face any issue like previously. But this approach looks more tedious by configuring two different filter attributes on the action method.'AutoValidateAntiForgeryToken' filter attribute will solve all the above problems we discussed. 'AutoValidateAntiForgeryToken' by adding on the controller level only validate the action method of type 'POST', it will automatically skip validation for methods like 'GET', 'OPTIONS', 'TRACE', etc.
Let's update the controller with the 'AutoValidateAntiForgeryToken' attribute as below.
Controllers/TestController.cs:
[AutoValidateAntiforgeryToken]
public class TestController : Controller
{
	[HttpGet]
	public IActionResult Index()
	{
		return View();
	}

	[HttpPost]
	public IActionResult Save()
	{
		return Content("Executed Post Save action method");
	}
}
Override Antiforgery Options:
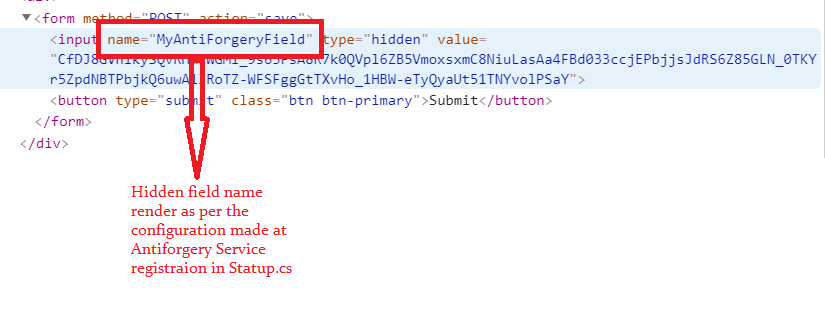
By registering Antiforgery service in Startup.cs file we can provide our own custom option to the service like Header Name, Form Field Name, Cookie Settings(Cookie Name, Expiration, etc).
Startup.cs:
services.AddAntiforgery(opiton => {
	opiton.FormFieldName = "MyAntiForgeryField";
	opiton.HeaderName = "ANTI-TOKEN-HEADERNAME";
});
Let's observe the difference of hidden field generated by @Html.AntiForgeryToken tag helper.Views/Test/Index.cshml:
<form method="POST" action="save">
	@Html.AntiForgeryToken()
	<button type="submit" class="btn btn-primary">Submit</button>
</form>
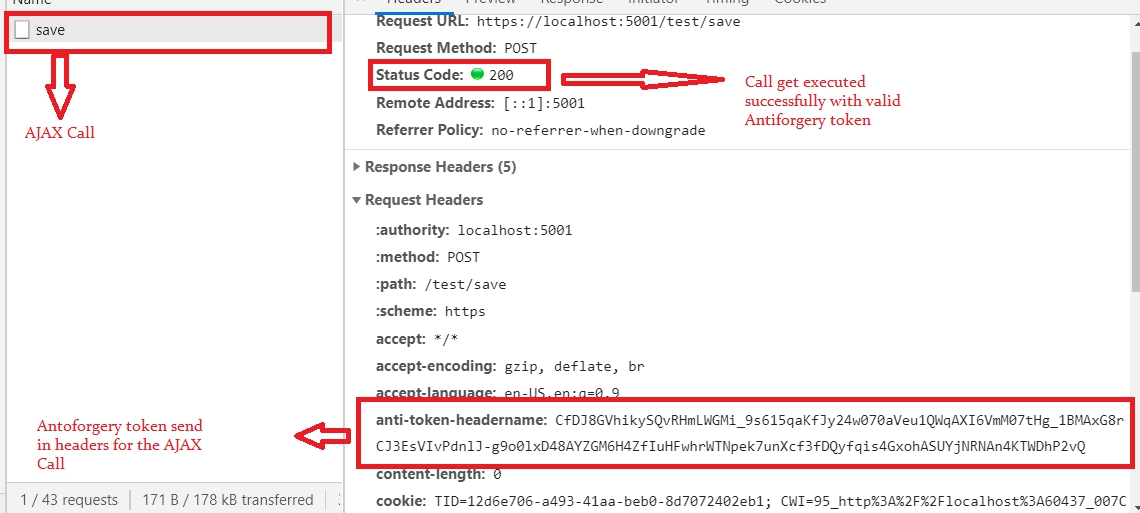
Validate By AJAX Call:
- Form post data using AJAX call can be validated against the ValidateAntiforgeryToken, by supplying the token in AJAX headers(The same concept will apply for Web API validation).
- This header name should be matched with the name configured in 'AddAntiforgery()' service in Startup.cs file.
- In this AJAX call approach, we need to read the AntiForgeryToken.
- Reading can be done either from the Cookie or Hidden Input field. Here we going to access it from the Hidden Input Field.
- As we know we can inject AntiForgeryToken into the page by using '@Html.AntiForgeryToken()' or 'IAntiforgery' interface.
- For Ajax call suitable approach is using 'IAntiforgery' interface, because here we create hidden field manually where we can add additional Html attributes to hidden field like 'Id','class', etc easily, which is not possible with '@Html.AntiForgeryToke()' tag helper which generates hidden field automatically.
- Using client libraries like Javascript, Jquery, Angular, etc we will read the anti-forgery token from the hidden field by using 'id' attribute.
Views/Test/Index.cshtml:
@inject Microsoft.AspNetCore.Antiforgery.IAntiforgery _antiforgery
@{
   string tokenValue = _antiforgery.GetAndStoreTokens(Context).RequestToken;
}

<div>
    <form method="POST" action="save">
        <input type="hidden" id="myToken" name="MyAntiForgeryField"
        value="@tokenValue">
        <button type="button" class="btn btn-primary" onclick="Submit()">Submit</button>
    </form>
</div>
- 'onclick=Submit()' button click triggers javascript 'submit' function.
- 'id=myToken' using hidden field 'id' attribute fetches token value in javascript.
Views/Test/Index.cshtml:(Add at bottom of page)
<script>
function Submit(){
   var token = $("#myToken").val();
   $.ajax({
	   beforeSend:function(request){
		   request.setRequestHeader("ANTI-TOKEN-HEADERNAME",token)
	   },
	   url:"https://localhost:5001/test/save",
	   type:"POST"
   })
}
</script>
- Using the hidden field 'id' attribute fetches the token value.
- 'ANTI-TOKEN-HEADERNAME' is custom header name this value must match with options set int 'AddAntiforgery()' service method in the Startup.cs file.
Wrapping Up:
Hopefully, this article will help to understand AntiforgeryToken In .Net Core Application. I love to have your feedback, suggestions, and better techniques in the comment sections.
Well explained ,keep it up.
ReplyDeleteThank you very much for this detailed explanation. It seems the RequestVerificationToken can also be sent in form-data. I've tested with Insomnia and it works:
ReplyDelete```
Content-Disposition: form-data; name="__RequestVerificationToken"
| CfDJ8AcKBMNi4DdLguow6v7WiDVltkwODWRKcrqi85_2_ommsENbr5rr79EgDIyBLr5P6mtluGEWnuFfZUrxvTjCNXR8U_wyjQLPXupnE1MsgrwS5DpDT4zc9e-AwHTbVLV3kwkuT-qlIbaU-k2pfSDfrcw
```
Is there a prefered way or can I just use whatever method ?