
Ionic Angular Page Life Cycle Methods

Page Life Cycle Methods:

Page life cycle methods are like default method gets executed on navigate to the page. Major life cycle methods in the Ionic application are:
  • ionViewWillEnter
  • ionViewDidEnter
  • ionViewWillLeave
  • ionViewDidLeave

Route Effects On Ionic Page State:

In angular <router-outlet> prebuild component where any page will be displayed inside of it dynamically based on route configuration components. Ionic with angular we have route template like <ion-router-outlet> which is extended from <router-outlet>.

On using <ion-router-outlet> ionic navigation work like :-
  • In an ionic application when the user navigates to a new page, ionic will save or store the old page(old page exists within the DOM in the hidden state) and display the new page.
  • Now if the user clicks on the old page link from the current page, ionic loads the old page from the storage(this means components will not be initialized freshly). It is like a cache for performance in mobile devices.
  • Pages are only removed from the DOM and components get initialized freshly only on hitting back arrow on browser or back button on mobile devices.

ngOnInit() And ngOnDestroy() Angular Life Cycle Methods:

In Angular most commonly used life cycle methods are ngOnInit() and ngOnDestroy(). ngOnInit() method is the component initialization method that helps for fetching data on component loaded. ngOnDestroy() method is to clear memory inside the component.

Since we discussed ionic pages get loaded from storage on 2nd visit onwards to a page. This explains ngOnInit()  method will not be called from 2nd visit of a page. But we might want to fetch fresh data from the server on every visit to a page. In that case, we should not call API's from ngOnInit().

ngOnDestroy() ionic application never gets called on navigating between the pages. Because the pages are not destroyed from the DOM. In generally in a pure angular application we are going to clear observables of a component in ngOnDestroy(). Now in ionic application implementing clearing observables in ngOnDestory() method won't work properly. ngOnDestroy() method only gets invoked on clicking back arrow of a browser or back button on mobile.

So the missing responsibilities by angular life cycle methods we have discussed above will be handled by the Ionic life cycle methods will be discussed in later steps.

Now to test ngOnInit() and ngOnDestroy() methods in ionic application lets create a sample application project and test as below.
tab1.page.ts:
ngOnInit(): void {
    console.log("Tab1 oninit")
}
ngOnDestroy(): void {
   console.log("Tab1 ondestroy")
}
tab2.page.ts:
ngOnInit(): void {
console.log("Tab 2 oninit");
}

ngOnDestroy(): void {
console.log("Tab 2 destroy");
}
Run the application and observe the console by navigating between the pages.

ionViewWillEnter:

This method gets executed on every page visit in an Ionic application. It is a good method to fetch the data from the services. But the only problem is when fetching heavy data from API's in this method and the application page navigation with an animation may lead to rendering disturbed DOM UI.

ionViewDidEnter:

This method gets executed on every page fully loaded. When we have performance issues to load API's data from 'ionViewWillEnter', we can use this method to fetch API data. Since this method gets executed only after full-page loaded, we need to show some loader to the users while fetching the data from the API.

ionViewWillLeave:

This method gets executed before navigate from the current page or page transition animation started. This is a good method to clean up the memory from the component like unsubscribing the observables to avoid memory leaks. This method is a perfect replacement for the ngOnDestroy() method.

ionViewDidLeave:

This method gets executed when the new page has fully loaded.

Sample Code To Test Ionic Life Cycle Methods:

Let's test the sample by creating an ionic project by selecting the "tab" template. Here in this sample application, we are going to create a "Todo Sample".
app/services/todolist.service.ts:
import { Injectable } from '@angular/core';
import { Observable, of } from 'rxjs';
import { map } from 'rxjs/operators';
import { HttpClient } from '@angular/common/http';

@Injectable({
  providedIn: 'root'
})
export class TodolistService {

  constructor(private http:HttpClient) { }

  getTodos():Observable<TodoItem[]>{
   // while testing please replace this to your api url
   return this.http.get('https://localhost:44379/api/todo/get-all')
   .pipe(map(data => data as TodoItem[]));
  }

  add(newItem:TodoItem): Observable<any>{
    // while testing please replace this to your api url
    return this.http.post("https://localhost:44379/api/todo/save",newItem);
  }
}

export interface TodoItem{
  id:number;
  itemNames:string
}
  • 'TodoItem' is an interface, which is the represents type of JSON from the API. 
  • 'getTodo()' method calls the Http Get API and this method returning Observable of an array of TodoItem type.
  • 'add()' posts the data to the server.
app/tab1/tab1.page.ts:
import { Component, OnInit, OnDestroy } from "@angular/core";
import { TodolistService, TodoItem } from "../services/todolist.service";

@Component({
  selector: "app-tab1",
  templateUrl: "tab1.page.html",
  styleUrls: ["tab1.page.scss"]
})
export class Tab1Page implements OnInit, OnDestroy {

  todolist: TodoItem[] = [];
  loadTodoSubs:any;

  constructor(private todoListService: TodolistService) {}

  ngOnInit(): void {
    this.loadTodoSubs = this.todoListService.getTodos().subscribe(data => {
      this.todolist = data;
    })
  }
  ngOnDestroy(): void {
    this.loadTodoSubs.unsubscribe();
    console.log("tab1 ngOnDestroy called");
  }
}
As per the angular life cycle here in "ngOnInit()" we are subscribing to service which will trigger the API call on component initialized and in "ngOnDestroy()" we are unsubscribing the observable to avoid the memory leaks within the application.
app/tab1/tab1.page.html:
<ion-header>
  <ion-toolbar>
    <ion-title>
      Tab One
    </ion-title>
  </ion-toolbar>
</ion-header>

<ion-content>
  <ion-item>
    <a routerLink="/tabs/tab2" routerLinkActive="active">Add</a>
  </ion-item>
  <ion-item *ngFor="let todo of todolist">
    <ion-label>{{todo.itemNames}}</ion-label>
  </ion-item>
</ion-content>
Here displaying the result by looping.
app/tab2/tab2.page.ts:
import { Component} from "@angular/core";
import { TodolistService, TodoItem } from '../services/todolist.service';
import { Router } from '@angular/router';

@Component({
  selector: "app-tab2",
  templateUrl: "tab2.page.html",
  styleUrls: ["tab2.page.scss"]
})
export class Tab2Page{
  inputTodoItem:string = "";
  constructor(private todoListService:TodolistService,
              private router:Router) {}

  save(){
    let newItem:TodoItem={
      id : 0,
      itemNames : this.inputTodoItem
    }
    this.todoListService.add(newItem).subscribe(data=> {
      this.router.navigate(['/tabs/tab1'])
    },error => {console.log(error)})
  }
}
Here in this component, we are saving 'TodoItem'.
app/tab2/tab2.page.html:
<ion-header>
  <ion-toolbar>
    <ion-title>
      Tab Two
    </ion-title>
  </ion-toolbar>
</ion-header>

<ion-content>
  <ion-item>
    <ion-input placeholder="Todo Item" [(ngModel)]="inputTodoItem"></ion-input>
  </ion-item>
  <ion-item>
    <ion-button type="button" (click)="save()">Save</ion-button>
  </ion-item>
</ion-content>
Now run the application, we can see the list of to-do items loaded from the "ngOnInit()" method by triggering API call as below.
Now click on the add button from the above picture it will be displayed as below.
By entering new 'Todo Item' into the text box and click on save. After successfully saving the item application will navigate back to the 'Todo Items' display page as below.
Here we don't see the newly added item, because we have discussed that from 2nd visit onwards page will be hidden and displayed from DOM instead of destroying and creating freshly for every new request.
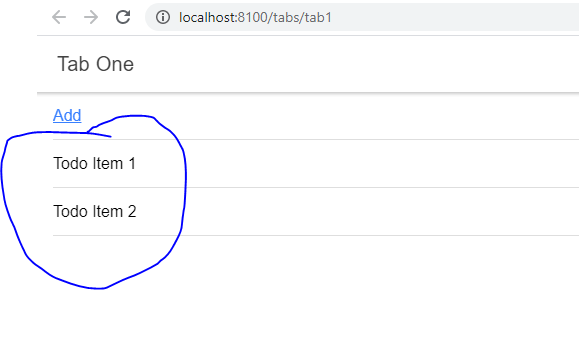
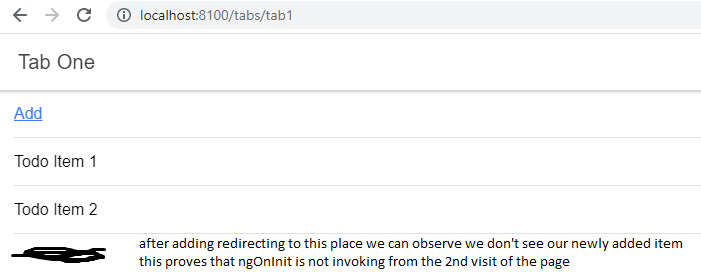
Now if we reload the page we can see the added item as below.
So to overcome this issue moves the logic inside the 'ngOnInit()' method to 'ionViewWillEnter()' as below
app/tab1/tab1.page.ts:
ngOnInit(): void {

}
ionViewWillEnter():void{
this.loadTodoSubs = this.todoListService.getTodos().subscribe(data => {
  this.todolist = data;
});
}
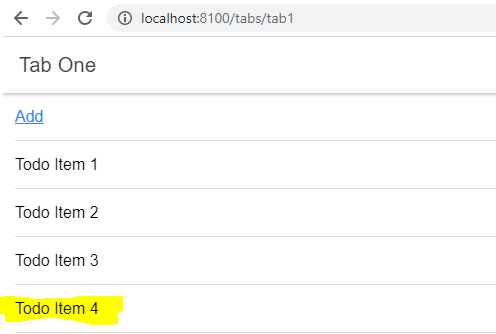
Now once again test the application, add a new item as below.
After adding navigate back to display item list page we can see now that the new item displaying as below.
This proves that unlike 'ngOnInit()' method that 'ionViewWillEnter()' method gets executed on every visit to the page.

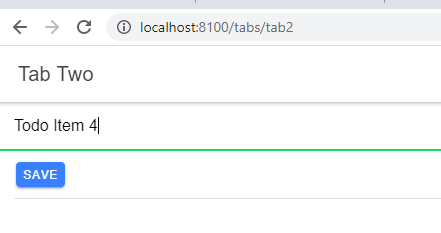
But there is a small issue with using 'ionViewWillEnter()' when an application having page loading animation and the application fetching heavy API data in 'ionViewWillEnter()' method then there may be performance and UI rendering issues. This can be solved by moving the logic from the 'ionViewWillEnter()' method to 'ionViewDidEnter()'. 'ionViewDidEnter()' gets executed only after the page is fully loaded, but here we need to add a loader while fetching the data to make application most user-friendly.

Similarly test 'ionViewDidEnter()' as below
app/tab1/tab1.page.ts:
ionViewDidEnter():void{
this.loadTodoSubs = this.todoListService.getTodos().subscribe(data => {
  this.todolist = data;
});
}

Now if we observe "ngOnDestroy()" method we are unsubscribing observable to avoid memory leaks. If we observe on navigating from one page to another "ngOnDestory()" won't execute because in ionic page is not destroyed but it will be hidden in the DOM while navigation. So to unsubscribe the observables shift the logic in "ngOnDestroy()" to 'ionViewWillLeave()' as below.
app/tab1/tab1.page.ts:
ionViewWillLeave():void{
this.loadTodoSubs.unsubscribe();
console.log("tab1 ionViewWillLeave called");
}

ngOnDestroy(): void {

  }
Now test we can observe the console.log() message gets printed.

Wrapping Up:

Hopefully, this article will help to understand the Ionic Life Cycle methods execution steps. I will love to have your feedback, suggestions and better techniques in the comment section.

Follow Me:

Comments

Popular posts from this blog

Angular 14 Reactive Forms Example

In this article, we will explore the Angular(14) reactive forms with an example. Reactive Forms: Angular reactive forms support model-driven techniques to handle the form's input values. The reactive forms state is immutable, any form filed change creates a new state for the form. Reactive forms are built around observable streams, where form inputs and values are provided as streams of input values, which can be accessed synchronously. Some key notations that involve in reactive forms are like: FormControl - each input element in the form is 'FormControl'. The 'FormControl' tracks the value and validation status of form fields. FormGroup - Track the value and validate the state of the group of 'FormControl'. FormBuilder - Angular service which can be used to create the 'FormGroup' or FormControl instance quickly. Form Array - That can hold infinite form control, this helps to create dynamic forms. Create An Angular(14) Application: Let'

.NET 7 Web API CRUD Using Entity Framework Core

In this article, we are going to implement a sample .NET 7 Web API CRUD using the Entity Framework Core. Web API: Web API is a framework for building HTTP services that can be accessed from any client like browser, mobile devices, and desktop apps. In simple terminology API(Application Programming Interface) means an interface module that contains programming functions that can be requested via HTTP calls either to fetch or update data for their respective clients. Some of the Key Characteristics of API: Supports HTTP verbs like 'GET', 'POST', 'PUT', 'DELETE', etc. Supports default responses like 'XML' and 'JSON'. Also can define custom responses. Supports self-hosting or individual hosting, so that all different kinds of apps can consume it. Authentication and Authorization are easy to implement. The ideal platform to build the REST full services. Install The SQL Server And SQL Management Studio: Let's install the SQL server on our l

ReactJS(v18) JWT Authentication Using HTTP Only Cookie

In this article, we will implement the ReactJS application authentication using the HTTP-only cookie. HTTP Only Cookie: In a SPA(Single Page Application) Authentication JWT token either can be stored in browser 'LocalStorage' or in 'Cookie'. Storing the JWT token inside of the cookie then the cookie should be HTTP Only. The HTTP-ONly cookie nature is that it will be only accessible by the server application. Client apps like javascript-based apps can't access the HTTP-Only cookie. So if we use the authentication with HTTP-only JWT cookie then we no need to implement the custom logic like adding authorization header or storing token data, etc at our client application. Because once the user authenticated cookie will be automatically sent to the server by the browser on every API call. Authentication API: To authenticate our client application with JWT HTTP-only cookie, I developed a NetJS(which is a node) Mock API. Check the GitHub link and read the document on G

.NET6 Web API CRUD Operation With Entity Framework Core

In this article, we are going to do a small demo on AspNetCore 6 Web API CRUD operations. What Is Web API: Web API is a framework for building HTTP services that can be accessed from any client like browser, mobile devices, desktop apps. In simple terminology API(Application Programming Interface) means an interface module that contains a programming function that can be requested via HTTP calls to save or fetch the data for their respective clients. Some of the key characteristics of API: Supports HTTP verbs like 'GET', 'POST', 'PUT', 'DELETE', etc. Supports default responses like 'XML' and 'JSON'. Also can define custom responses. Supports self-hosting or individual hosting, so that all different kinds of apps can consume it. Authentication and Authorization are easy to implement. The ideal platform to build REST full services. Create A .NET6 Web API Application: Let's create a .Net6 Web API sample application to accomplish our

Angular 14 State Management CRUD Example With NgRx(14)

In this article, we are going to implement the Angular(14) state management CRUD example with NgRx(14) NgRx Store For State Management: In an angular application to share consistent data between multiple components, we use NgRx state management. Using NgRx state helps to avoid unwanted API calls, easy to maintain consistent data, etc. The main building blocks for the NgRx store are: Actions - NgRx actions represents event to trigger the reducers to save the data into the stores. Reducer - Reducer's pure function, which is used to create a new state on data change. Store - The store is the model or entity that holds the data. Selector - Selector to fetch the slices of data from the store to angular components. Effects - Effects deals with external network calls like API. The effect gets executed based the action performed Ngrx State Management flow: The angular component needs data for binding.  So angular component calls an action that is responsible for invoking the API call.  Aft

Unit Testing Asp.NetCore Web API Using xUnit[.NET6]

In this article, we are going to write test cases to an Asp.NetCore Web API(.NET6) application using the xUnit. xUnit For .NET: The xUnit for .Net is a free, open-source, community-focused unit testing tool for .NET applications. By default .Net also provides a xUnit project template to implement test cases. Unit test cases build upon the 'AAA' formula that means 'Arrange', 'Act' and 'Assert' Arrange - Declaring variables, objects, instantiating mocks, etc. Act - Calling or invoking the method that needs to be tested. Assert - The assert ensures that code behaves as expected means yielding expected output. Create An API And Unit Test Projects: Let's create a .Net6 Web API and xUnit sample applications to accomplish our demo. We can use either Visual Studio 2022 or Visual Studio Code(using .NET CLI commands) to create any.Net6 application. For this demo, I'm using the 'Visual Studio Code'(using the .NET CLI command) editor. Create a fo

Angular 14 Crud Example

In this article, we will implement CRUD operation in the Angular 14 application. Angular: Angular is a framework that can be used to build a single-page application. Angular applications are built with components that make our code simple and clean. Angular components compose of 3 files like TypeScript File(*.ts), Html File(*.html), CSS File(*.cs) Components typescript file and HTML file support 2-way binding which means data flow is bi-directional Component typescript file listens for all HTML events from the HTML file. Create Angular(14) Application: Let's create an Angular(14) application to begin our sample. Make sure to install the Angular CLI tool into our local machine because it provides easy CLI commands to play with the angular application. Command To Install Angular CLI npm install -g @angular/cli Run the below command to create the angular application. Command To Create Angular Application ng new name_of_your_app Note: While creating the app, you will see a noti

Part-1 Angular JWT Authentication Using HTTP Only Cookie[Angular V13]

In this article, we are going to implement a sample angular application authentication using HTTP only cookie that contains a JWT token. HTTP Only JWT Cookie: In a SPA(Single Page Application) Authentication JWT token either can be stored in browser 'LocalStorage' or in 'Cookie'. Storing JWT token inside of the cookie then the cookie should be HTTP Only. The HTTP-Only cookie nature is that it will be only accessible by the server application. Client apps like javascript-based apps can't access the HTTP-Only cookie. So if we use authentication with HTTP only JWT cookie then we no need to implement custom logic like adding authorization header or storing token data, etc at our client application. Because once the user authenticated cookie will be automatically sent to the server by the browser on every API call. Authentication API: To implement JWT cookie authentication we need to set up an API. For that, I had created a mock authentication API(Using the NestJS Se

ReactJS(v18) Authentication With JWT AccessToken And Refresh Token

In this article, we are going to do ReactJS(v18) application authentication using the JWT Access Token and Refresh Token. JSON Web Token(JWT): JSON Web Token is a digitally signed and secured token for user validation. The JWT is constructed with 3 important parts: Header Payload Signature Create ReactJS Application: Let's create a ReactJS application to accomplish our demo. npx create-react-app name-of-your-app Configure React Bootstrap Library: Let's install the React Bootstrap library npm install react-bootstrap bootstrap Now add the bootstrap CSS reference in 'index.js'. src/index.js: import 'bootstrap/dist/css/bootstrap.min.css' Create A React Component 'Layout': Let's add a React component like 'Layout' in 'components/shared' folders(new folders). src/components/shared/Layout.js: import Navbar from "react-bootstrap/Navbar"; import { Container } from "react-bootstrap"; import Nav from "react-boot

A Small Guide On NestJS Queues

NestJS Application Queues helps to deal with application scaling and performance challenges. When To Use Queues?: API request that mostly involves in time taking operations like CPU bound operation, doing them synchronously which will result in thread blocking. So to avoid these issues, it is an appropriate way to make the CPU-bound operation separate background job.  In nestjs one of the best solutions for these kinds of tasks is to implement the Queues. For queueing mechanism in the nestjs application most recommended library is '@nestjs/bull'(Bull is nodejs queue library). The 'Bull' depends on Redis cache for data storage like a job. So in this queueing technique, we will create services like 'Producer' and 'Consumer'. The 'Producer' is used to push our jobs into the Redis stores. The consumer will read those jobs(eg: CPU Bound Operations) and process them. So by using this queues technique user requests processed very fastly because actually