In this article, we are going to explore the steps to implement the In-Memory Cache in the NestJS application.
Caching can significantly improve application performance and its scalability by reducing the workload to generate the content. In-Memory cache creates within the server application memory. Since it uses application memory it delivers content more fastly. But if our application runs on multiple nodes or multiple servers then the in-memory cache can't be shared between the nodes or server each will maintains its own in-memory cache.
Create A Sample NestJS Application:
Let's understand step by step implementation authentication in NestJs application, so let's begin our journey by creating a sample application.
Command To Install CLI:
npm i -g @nestjs/cli
Command To Create NestJS App:
nest new your_project_name
Install Cache Npm Packages:
NestJS Cache NPM Packages:
npm install cache-manager
npm install -D @types/cache-manager
Register CacheModule:
Now let's register the CacheModule in the AppModule file.
src/app.module.ts:
import { Module,  CacheModule } from '@nestjs/common';
// existing code hidden for display purpose

@Module({
  imports: [CacheModule.register()]
})
export class AppModule {}
- Register the 'CacheModule' with empty configuration that means its automatically uses the In-memory cache.If we want to use external cache store like redis then we have to pass configuration values to the 'register()' method. The 'CacheModule' loads from the '@nestjs/common'.
Inject CacheManager:
Now to communicate with the cache store or memory we need to inject into our controller.
src/app.controller.ts:
import { Controller, Inject, CACHE_MANAGER } from '@nestjs/common';
import {Cache} from 'cache-manager';

@Controller()
export class AppController {
  constructor(@Inject(CACHE_MANAGER) private cacheManager: Cache) {}
}
- The 'Cache' is the type of our cache store that loads from the 'cache-manager' library. The 'CACHE_MANAGER' is lookup key for the provider to be injected and this loads from the '@nestjs/common' library.
Get And Set Methods Of Cache Store:
The 'Set' method to save the data into our In-memory cache. The 'Get' method is to fetch data from the In-memory cache.
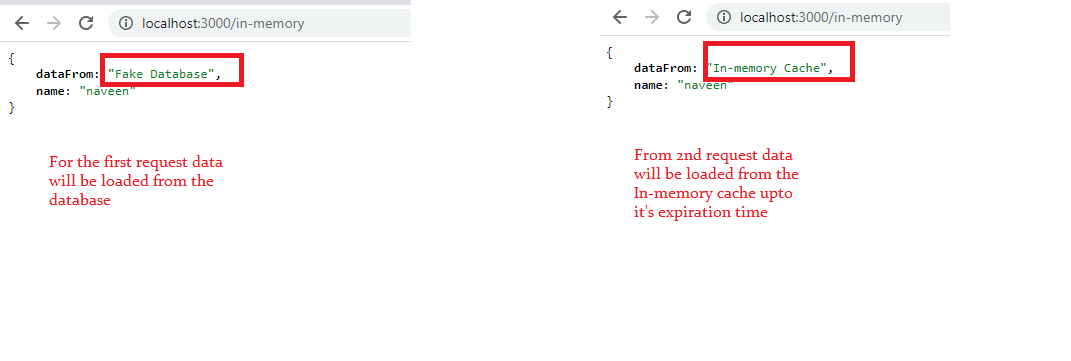
Let's create sample endpoint that saves and fetches the simple string from the In-Memory cache store.
src/app.controller.cs:
import { Controller, Get, Inject, CACHE_MANAGER } from '@nestjs/common';
import {Cache} from 'cache-manager';
@Controller()
export class AppController {

  myfakeDB:string ="naveen";

  constructor(@Inject(CACHE_MANAGER) private cacheManager: Cache) {}

  @Get('in-memory')
  async getFromMemoryCache(){
    let value = await this.cacheManager.get('name');
    if(value){
      return{
        dataFrom: 'In-memory Cache',
        name: value
      }
    }
    await this.cacheManager.set('name', this.myfakeDB, {ttl: 300} );
    return {
      dataFrom: 'Fake Database',
      name: this.myfakeDB
    }
  }
}
- (Line: 6) The 'myfakeDB' variable let's assume like fetching the value from the database.
- (Line: 12) The 'get()' method fetches the data saved in the In-memory cache store with respect to the 'key' passed to it. So here we are to check whether our data is available in the In-Memory cache or not.
- (Line: 13-18) Return the response data from the In-memory cache.
- (Line: 19) The 'set()' method to save the data from our application to the In-memory cache-store. While saving data we are passing our data expiration time as 300sec(5 minutes).
- (Line: 20-23) Return the response data from the database(in our sample a fake data).
src/shared/models/Person.ts:
export interface Person {
  name: string;
  email: string;
}
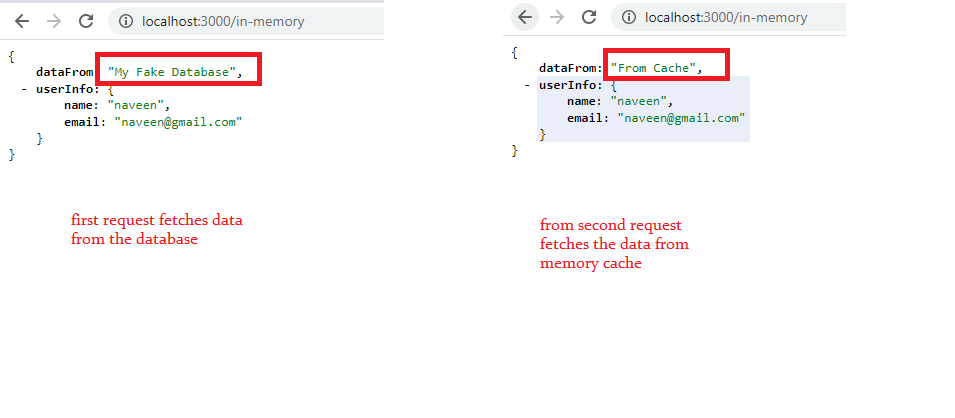
Now let's update the endpoint to save the object type data into the In-Memory cache.src/app.controller.ts:
import { Controller, Get, Inject, CACHE_MANAGER } from '@nestjs/common';
import {Cache} from 'cache-manager';
import { Person } from './shared/models/person';

@Controller()
export class AppController {

  myfakeDB:Person = {
    name:"naveen",
    email:"naveen@gmail.com"
  };

  constructor(@Inject(CACHE_MANAGER) private cacheManager: Cache) {}

  @Get('in-memory')
   async getFromMemoryCache(){
    let value = await this.cacheManager.get<Person>('user-info');
    if(value){
      return {
        dataFrom: 'From Cache',
        userInfo: value
      }
    }

    await this.cacheManager.set<Person>('user-info',this.myfakeDB, {ttl: 300});
    return {
      dataFrom: 'My Fake Database',
      userInfo: this.myfakeDB
    }
  }
}
Here we can observe the saving of complex objects into the In-Memory cache.Del And Reset Methods Of Cache-Store:
The cache store provides the method 'del('key')' used to delete the record from the cache.
await this.cacheManager.del('your_key_to_delte');
The cache store provides the method 'reset()' used to clear the entire In-Memory cache.
await this.cacheManager.reset()That's all about some core features to implement an In-Memory cache in the NestJS application.
Support Me!
Buy Me A Coffee
PayPal Me
Wrapping Up:
Hopefully, I think this article delivered some useful information on In-Memory Cache in the NestJS application. I love to have your feedback, suggestions, and better techniques in the comment section below.


Thanks a lot. saved me a big time
ReplyDeleteThanks for the article interesting I am implementing nestjs in our organization and found your article useful I do have an issue and hoping you could help i am getting a promise object returned when I do a get after a set
ReplyDeleteHi Dwarak
Deletemay be you missing await before get