-12.png)
Click here for part-1
Install Handlebar Package:
Email body dynamic data binding can be achieved by using the 'Handlebar' libraries.
npm install --save handlebars
Register Handlebar Configuration:
Let's register our handlebar template configuration into the 'MailerModule' in the 'AppModule'.
src/app.module.ts:
import { MailerModule } from '@nestjs-modules/mailer';
import { Module } from '@nestjs/common';
import { join } from 'path';
import { AppController } from './app.controller';
import { AppService } from './app.service';
import { EmailController } from './email.controller';
import { HandlebarsAdapter } from '@nestjs-modules/mailer/dist/adapters/handlebars.adapter';

@Module({
  imports: [
    MailerModule.forRoot({
      transport: {
        host: 'smtp.sendgrid.net',
        auth: {
          user: 'apikey',
          pass: 'xxxxxxxyyyyyyyyyy',
        },
      },
      template: {
        dir: join(__dirname, 'mails'),
        adapter: new HandlebarsAdapter(),
        options: {
          strict: true,
        },
      },
    }),
  ],
  controllers: [AppController, EmailController],
  providers: [AppService],
})
export class AppModule {}
- (Line: 19-25) The 'template' property to configure the handlebar configurations.
- (Line: 20) The 'dir' property specifies the email templates folder path. The '_dirnmae' gives the application folder location, and the 'mails'(folder will be created in upcoming steps) will be the folder inside of the 'src' folder.
- (Line: 21) The 'adapter' property assign he 'new HandlebarsAdapter' that loads from the '@nestjs-modules/mailer/dist/adapters/handlebars.adapter'.
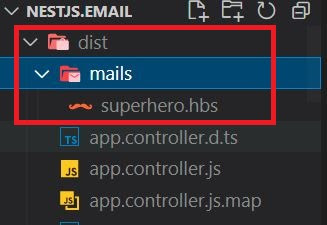
Create Handlerbar('*.hbs') File For Email:
First, let's create a folder like 'mails' inside of the 'src' folder. Now let's add the Handlebar template file into the 'src/mails' like 'superhero.hbs'. The Handler bar file extension is '.hbs'.
src/mails/superhero.hbs:
<html>

<head>
    <meta charset='utf-8' />
    <title></title>
    <style>
        .siteTitle {
            display: block;
            font-weight: 900;
            font-size: 30px;
            margin: 20px 0;
        }

        .card {
            height: 400px;
            position: relative;
            padding: 20px;
            box-sizing: border-box;
            display: flex;
            align-items: flex-end;
            text-decoration: none;
            border: 4px solid #b0215e;
            margin-bottom: 20px;
            background-image: url('{{superHero.imageUrl}}');
            background-size: cover;

        }

        .inner {
            height: 50%;
            display: flex;
            flex-direction: column;
            justify-content: center;
            align-items: center;
            background: white;
            box-sizing: border-box;
            padding: 40px;


        }

        .title {
            font-size: 24px;
            color: black;
            text-align: center;
            font-weight: 700;
            color: #181818;
            text-shadow: 0px 2px 2px #a6f8d5;
            position: relative;
            margin: 0 0 20px 0;


        }
    </style>
</head>

<body>
    <div class='card'>
        <div class='inner'>
            <h2 class='title'>{{superHero.name}}</h2>
            <div>
                <ul>
                    {{#each superHero.powers}}
                    <li>{{this}}</li>
                    {{/each}}
                </ul>
            </div>
        </div>
    </div>
</body>

</html>
- Here is our HTML email body that contains dynamic data points that get populated before sending to the email with the help of Handlebar.
- In a handlebar template, dynamic data points render as '{{ property_name }}'.
- The 'superHero' is my template object for binding the data.
- (Line: 24&60) Simple property dynamic data binding.
- (Line: 63-65) The '#each' represent the loop binding in the handlebar template.
Configure Email Folder In nest-cli.json:
On building the nestjs application to copy the handlebar templates we need to add additional configuration in the 'nest-cli.json'.
nest-cli.json:
{
  "collection": "@nestjs/schematics",
  "sourceRoot": "src",
  "compilerOptions": {
    "assets": ["mails/**/*"],
    "watchAssets": true
  }
}
- Here configure the 'assets' array where we define our HTML folder path inside of the 'compilerOptions'.
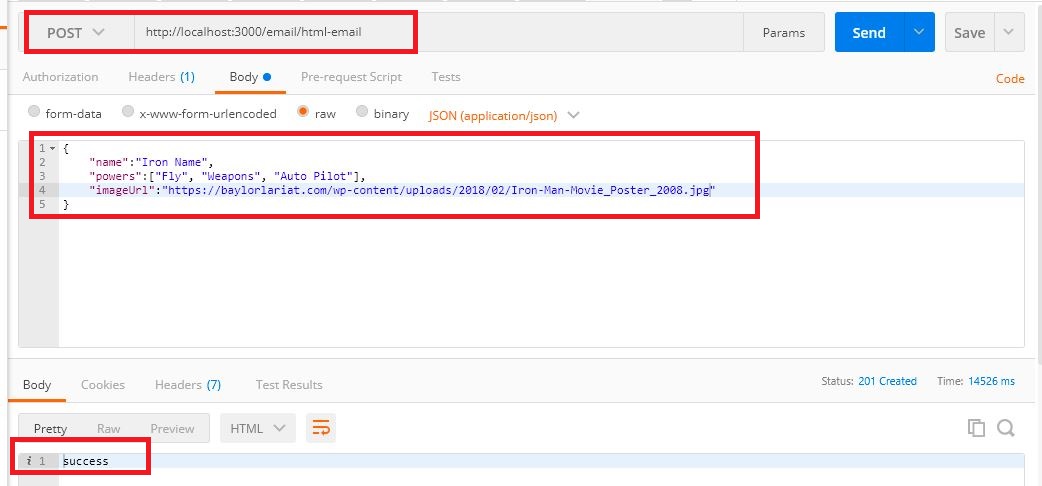
Action Method To Send HTML Email:
Let's create a new endpoint to send the HTML email.
src/email.controller.cs:
@Post('html-email')
async postHTMLEmail(@Body() superHero: any) {
var response = await this.mailService.sendMail({
  to: 'bommidinaveen@gmail.com',
  from: 'nani.bommidi93@gmail.com',
  subject: 'HTML Dynamic Template',
  template: 'superhero',
  context: {
	superHero:superHero
  },
});
return 'success';
}
- (Line: 7) The 'template' property assigns the name of the handlebar file name.
- (Line: 8-10) The 'context' object assigns the dynamic data that we want to bind to the handlebar template.
In the next article, we are going to understand the file attachment in an email.
Support Me!
Buy Me A Coffee
PayPal Me
Video Session:
Wrapping Up:
Hopefully, I think this article delivered some useful demo on sending simple plain email from the NestJS application. using I love to have your feedback, suggestions, and better techniques in the comment section below.
Comments
Post a Comment