In this article, we will implement ReactJS application state management using Redux Toolkit with a CRUD example.Redux Toolkit For State Management:
(Step 2)
Redux Toolkit For State Management:
In the ReactJS application to share data between components consistently, we can use the Redux Toolkit. The Redux Toolkit is built on top of the standard 'Redux' to overcome a few concerns like 'complexity to configure the redux', 'avoiding additional packages to integrate with redux', 'to avoid the too much boilerplate code generated by redux'.
The main building component of Redux Toolkit are:
- Actions - actions represent events to trigger the reducer to update data into the store.
- Reducers - In general in 'Redux' reducer pure function to create the state instead of changing the state. But in 'Redux Toolkit' we can mutate the state directly, but internally using the 'Immer' library our logic generates a new state instead of mutating the existing state.
- Store - object where we store our data.
- Selectors - selectors help to fetch any slice of data from the store.
- Thunk Middleware - these execute before action executes the reducers. So here we make our HTTP request.
Create ReactJS Application:
Let's create a ReactJS application to accomplish our demo.
npx create-react-app name-of-your-app
Configure React Bootstrap Library:
Let's install the React Bootstrap library
npm install react-bootstrap bootstrap
Now add the bootstrap CSS file reference.
import 'bootstrap/dist/css/bootstrap.min.css'
Create React Component 'Layout':
Now let's React component like 'Layout' inside of 'components/shared'(new folders). This 'Layout' component will be our master template where we can have a header and footer.
src/components/shared/Layout.js:
import { Container } from "react-bootstrap";
import Navbar from 'react-bootstrap/Navbar';

const Layout = (props) => {
  return (
    <>
      <Navbar bg="dark" variant="dark">
        <Navbar.Brand href="#home">Cars</Navbar.Brand>
      </Navbar>
      <Container>{props.children}</Container>
    </>
  );
};
export default Layout;
- (Line: 7-9) Configured the React Bootstrap Navbar component.
- (Line: 10) Content that will be added inside of '<Layout>' component gets rendered here by reading them as 'props.children'.
src/App.js:
import logo from "./logo.svg";
import "./App.css";
import Layout from "./components/shared/Layout";

function App() {
  return (
    <>
      <Layout>Here Page content will be rendered</Layout>
    </>
  );
}
export default App;
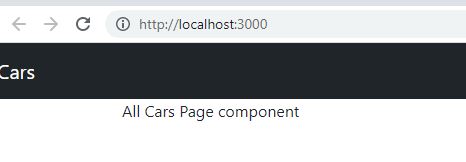
Create A React Component 'AllCars':
Let's create a page-level react component like 'AllCars' inside of 'pages' folder(new folder).
src/pages/AllCars.js:
const AllCars = () => {
  return <>All Cars Page component</>;
};
export default AllCars;
Configure React Routing:
Install the 'react-router-dom' package.
npm i react-router-dom
Now configure the 'Routes' component in the 'App' component.
src/App.js:
import logo from "./logo.svg";
import "./App.css";
import Layout from "./components/shared/Layout";
import { Route, Routes } from "react-router-dom";
import AllCars from "./pages/AllCars";

function App() {
  return (
    <>
      <Layout>
        <Routes>
          <Route path="/" element={<AllCars />}></Route>
        </Routes>
      </Layout>
    </>
  );
}
export default App;
- (Line: 12) The home page route is configured to the 'AllCars' component.
src/index.js:
import React from "react";
import ReactDOM from "react-dom/client";
import "./index.css";
import App from "./App";
import "bootstrap/dist/css/bootstrap.min.css";
import { BrowserRouter } from "react-router-dom";

const root = ReactDOM.createRoot(document.getElementById("root"));
root.render(
  <BrowserRouter>
    <App />
  </BrowserRouter>
);
Install Redux Toolkit Package:
Let's install the Redux and Redux Toolkit packages.
npm install @reduxjs/toolkit react-redux
Initial Redux Toolkit Configurations:
In Redux Toolkit 'createSlice' is a function that accepts the initial state, an object of reducer functions, and a name of the slice, and automatically generates action creator and action types that correspond to the reducers and state.
Let's add a 'createSlice' like 'carslice.js' file in 'features/cars' folders(new folder structure for store related files).
src/features/cars/carslice.js:
const { createSlice } = require("@reduxjs/toolkit");

const initialState = {
  carsData: [],
  loading: "idle",
};

const carslice = createSlice({
  name: "cars",
  initialState,
  reducers: {},
  extraReducers: (builder) => {}
});

export default carslice.reducer;
- (Line: 3-6) The initial data for the cars store. Here 'carsData' property we are going to store the collection of data from the API. Here 'loading' property to understand where our API is in a 'pending' or 'completed' state.
- (Line: 8) The 'createSlice' loads from the '@reduxjs/toolkit' library.
- (Line: 9) The name of our slice
- (Line: 10) The initialState of our store.
- (Line: 11) The reducer will contain actions to update the store. These action methods get invoked directly.
- (Line: 12) The 'extraReducer' also contains action that will be invoked by the 'Thunk' middleware depending on a state like 'pending', 'fulfilled', or 'rejected' action.
src/features/store.js:
import { configureStore } from "@reduxjs/toolkit";
import carReducer from "./cars/carslice";

export const store = configureStore({
  reducer: {
    car: carReducer,
  },
});
- Here 'carReducer' loads from our 'carslice.js' file and register with the root store with the name of 'car'.
src/index.js:
import React from "react";
import ReactDOM from "react-dom/client";
import "./index.css";
import App from "./App";
import "bootstrap/dist/css/bootstrap.min.css";
import { BrowserRouter } from "react-router-dom";
import { Provider } from "react-redux";
import { store } from "./features/store";

const root = ReactDOM.createRoot(document.getElementById("root"));
root.render(
  <Provider store={store}>
    <BrowserRouter>
      <App />
    </BrowserRouter>
  </Provider>
);
- Here 'Provider' component loads from the 'react-redux', the store attribute configured with our 'store' from 'features/store.js' and now the store is available to our entire application.
Setup Json Server:
Let's setup the fake API by setting up the JSON server in our local machine.
Run the below command to install the JSON server globally onto your local machine.
npm install -g json-server
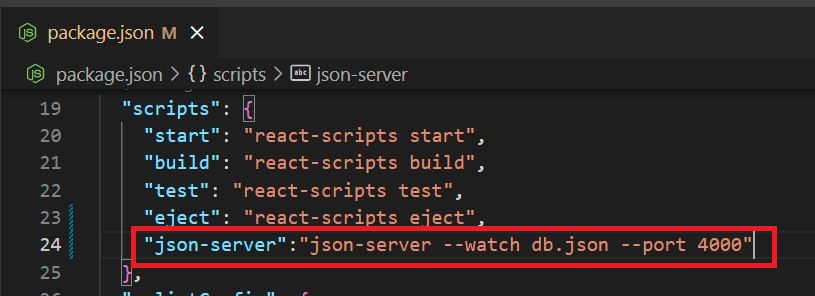
For our demo purpose go to the ReactJS application and add the following to the 'package.json' file. By default, the JSON server runs on port number 3000, ReactJS also runs on the same portal locally so here we specify another port number explicitly.
"json-server":"json-server --watch db.json --port 4000"
Now to invoke the above command run the following command in the ReactJS app root folder
npm run json-server
After running the above command for the first time, a 'db.json' file gets created, so this file act as a database. So let's add some sample data to the file below.
Now access our fake JSON API at 'http://localhost:4000/cars'.
Install Axios Package:
To invoke API calls let's install the 'Axios' library.
npm i axios
Implement Read Operation Without AsyncThunk Middleware:
Let's focus on implementing read operation fetching API data through Redux Toolkit StateManagement. Here we implement logic without using AsyncThunk middleware.
Let's add actions and selectors in our 'carslice.js'.
src/features/car/carslice.js:
const { createSlice } = require("@reduxjs/toolkit");

const initialState = {
  carsData: [],
  loading: "idle",
};

const carslice = createSlice({
  name: "cars",
  initialState,
  reducers: {
    allCarsLoading: (state) => {
      if (state.loading === "idle") {
        state.loading = "pending";
      }
    },
    allCarsRecieved: (state, { payload }) => {
      state.loading = "idle";
      state.carsData = payload;
    },
  },
  extraReducers: (builder) => {},
});

export const { allCarsLoading, allCarsRecieved } = carslice.actions;

export const getAllCars = (state) => state.car.carsData;
export const getLoading = (state) => state.car.loading;

export default carslice.reducer;
- (Line: 12-16) The 'allCarsLoading' is an action method. Here we are updating the 'loading' property value to 'pending'.
- (Line: 17-21) The 'allCarsRecieved' is an action method. Here we are updating the 'carsData' with our API response and 'loading' property to 'idle'.
- (Line: 27) The 'getAllCars' is selector to fetch all the data from the store. Here 'state.car.carsData' where 'car' is the name of the reducer registered at the 'store.js' and 'carData' is the property of our state.
src/pages/AllCars.js:
import axios from "axios";

import Card from "react-bootstrap/Card";
import Col from "react-bootstrap/Col";
import Row from "react-bootstrap/Row";
import Spinner from "react-bootstrap/Spinner";
import { useEffect } from "react";
import { useDispatch, useSelector } from "react-redux";
import {
  getAllCars,
  getLoading,
  allCarsLoading,
  allCarsRecieved,
} from "../features/cars/carslice";
import { Container } from "react-bootstrap";

const AllCars = () => {
  const allCars = useSelector(getAllCars);
  const apiStatus = useSelector(getLoading);
  const dispatch = useDispatch();
  let contentToRender = "";

  useEffect(() => {
    const invokeAllCarsAPI = async () => {
      dispatch(allCarsLoading());
      const apiResponse = await axios.get("http://localhost:4000/cars");
      dispatch(allCarsRecieved(apiResponse.data));
    };

    invokeAllCarsAPI();
  }, [dispatch]);

  contentToRender =
    apiStatus === "pending" ? (
      <>
        <div className=" d-flex align-items-center justify-content-center">
          <Spinner animation="border" role="status">
            <span className="visually-hidden">Loading...</span>
          </Spinner>
        </div>
      </>
    ) : (
      <>
        <Row xs={1} md={3} className="g-4">
          {allCars.map((car) => (
            <Col key={car.id}>
              <Card>
                <Card.Img variant="top" src={car.imageUrl} />
                <Card.Body>
                  <Card.Title>{car.name}</Card.Title>
                  <Card.Text>Model Year - {car.year}</Card.Text>
                </Card.Body>
              </Card>
            </Col>
          ))}
        </Row>
      </>
    );

  return <Container className="mt-2">{contentToRender}</Container>;
};

export default AllCars;
- The 'useSelector' and 'useDispatch' loads from the 'react-redux'. The 'useSelector' helps to fetch the specified slice of data from the store. The 'useDispatch' helps to invoke the action methods of reducers.
- (Line: 18) The 'useSelector(getAllCars)' selector fetches all our API response that was saved in the store.
- (Line: 19) The 'useSelector(getLoading)' selector fetches API status like 'idle' or 'pending' to display the loader on our page.
- (Line: 20) Initialized the 'useDispatch' store.
- (Line: 21) The 'contentToRender' variable initialized.
- (Line: 23-31) Inside of the 'useEffect' implemented logic to invoke the API call.
- (Line: 25) The 'dispatch(allCarsLoading())' invokes the 'allCarsLoading' action method in the reducer. This action method updates 'loading' to 'pending' in the store.
- (Line: 26) Invoking our HTTP GET API call and waiting for the response.
- (Line: 27) The 'dispatch(allCarsRecieved(apiResponse.data))' invokes the 'allCarsLoading' action method to the reducer. The action method saves the 'apiRespons.data' to 'carData' property in store and also set the 'loading' property to 'idle'.
- (Line: 33-58) Here the 'apiStatus' variable value 'pending' then displays the spinner component. and if the variable value is 'idle' then show the actual content.
Implement Read Operation With Async Thunk Middleware:
Let's update our read operation implementation by including the async-thunk middleware.
Let's create thunk middleware and also extra reducers that get executed by the state of API invoked in the thunk middleware.
src/features/cars/carslice.js:
import axios from "axios";

const { createSlice, createAsyncThunk } = require("@reduxjs/toolkit");

export const fetchALLCars = createAsyncThunk("cars/getAPI", async () => {
  const response = await axios.get("http://localhost:4000/cars");
  return response.data;
});

const initialState = {
  carsData: [],
  loading: "idle",
};

const carslice = createSlice({
  name: "cars",
  initialState,
  reducers: {
  },
  extraReducers: (builder) => {
    builder.addCase(fetchALLCars.pending, (state, action) => {
      state.loading = "pending";
    });
    builder.addCase(fetchALLCars.fulfilled, (state, action) => {
      state.loading = "idle";
      state.carsData = action.payload;
    });
  },
});

export const getAllCars = (state) => state.car.carsData;
export const getLoading = (state) => state.car.loading;

export default carslice.reducer;
- (Line: 5-8) The 'createAsyncThunk()' loads from the '@reduxjs/toolkit'. Here implemented our API logic. The Redux Thunk supports 3 different actions based on the API state are like 'pending', 'fulfilled', and 'rejected'.
- (Line: 20-28) Here we registered to 2 thunk action methods like 'fetchAllCars.pending' and 'fetchAllCars.fulfilled'. These action methods automatically get invoked by our redux-thunk.
- Here we have removed our actions like 'allCarsLoading' and 'allCarsRecieved' in 'reducers'. Because those were replaced by the 'extraReducers'.
Now let's invoke the 'fetchAllCars' redux-thunk from our 'AllCars.js' component.
src/pages/AllCars.js:
import {fetchALLCars,getAllCars,getLoading,} from "../features/cars/carslice";

useEffect(() => {
    dispatch(fetchALLCars());
}, [dispatch]);
- Here we can observe we had removed API call logic from the 'useEffect' and we simply invoking our redux-thunk using 'dispatch'.
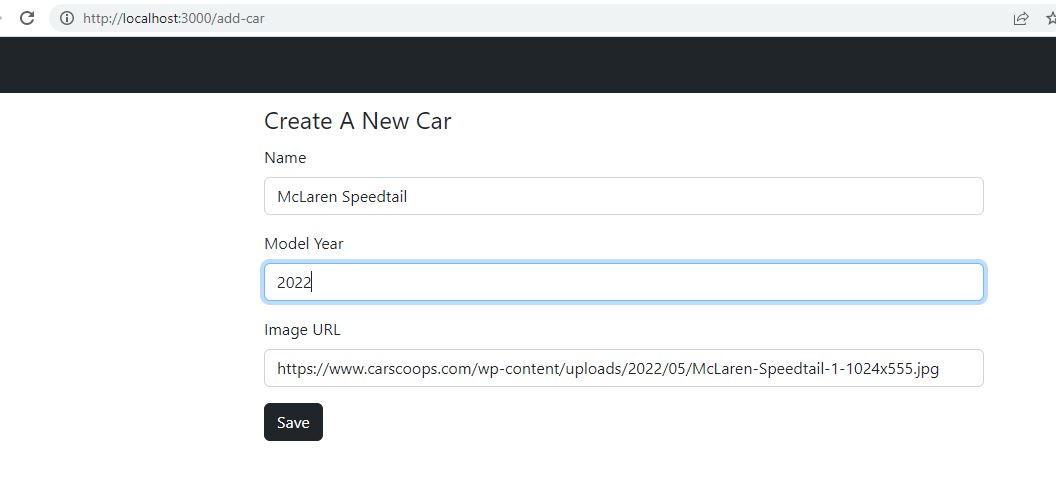
Create React Component 'AddCar':
Let's create a new React component like 'AddCar' in the 'pages' folder.
src/pages/AddCar:
const AddCar = () => {
  return <></>;
};
export default AddCar;
Add route for the 'AddCar' component in 'App' componentsrc/App.js:
import logo from "./logo.svg";
import "./App.css";
import Layout from "./components/shared/Layout";
import { Route, Routes } from "react-router-dom";
import AllCars from "./pages/AllCars";
import AddCar from "./pages/AddCar";

function App() {
  return (
    <>
      <Layout>
        <Routes>
          <Route path="/" element={<AllCars />}></Route>
          <Route path="/add-car" element={<AddCar />}></Route>
        </Routes>
      </Layout>
    </>
  );
}
export default App;
Install React Hook Form Library:
Let's install the React Hook Form library.
npm install react-hook-form
Implement Create Operation:
Let's focus on implementing the create operation.
Define redux-thunk action for our HTTP Post API call in our 'carslice.js'
src/features/carslice.js:
import axios from "axios";

const { createSlice, createAsyncThunk } = require("@reduxjs/toolkit");

export const fetchALLCars = createAsyncThunk("cars/getAPI", async () => {
  const response = await axios.get("http://localhost:4000/cars");
  return response.data;
});

export const saveNewCar = createAsyncThunk(
  "cars/createAPI",
  async (payload) => {
    const response = await axios.post("http://localhost:4000/cars", payload);
    return response.data;
  }
);

const initialState = {
  carsData: [],
  loading: "idle",
};

const carslice = createSlice({
  name: "cars",
  initialState,
  reducers: {},
  extraReducers: (builder) => {
    builder.addCase(fetchALLCars.pending, (state, action) => {
      state.loading = "pending";
    });
    builder.addCase(fetchALLCars.fulfilled, (state, action) => {
      state.loading = "idle";
      state.carsData = action.payload;
    });
    builder.addCase(saveNewCar.pending, (state, action) => {
      state.loading = "pending";
    });
    builder.addCase(saveNewCar.fulfilled, (state, action) => {
      state.loading = "idle";
      state.carsData.unshift(action.payload);
    });
  },
});

export const getAllCars = (state) => state.car.carsData;
export const getLoading = (state) => state.car.loading;

export default carslice.reducer;
- (Line: 10-16) The 'saveNewCar' is redux-thunk middleware to invoke the HTTP post API call.
- (Line: Line:35-$1) The 'saveNewCar.pending' action method executes on API call is pending and here we update the 'loading' value to 'pending'. The 'saveNewCar.fulfilled' executes on API call success and here we push our newly created item into the store and resets the 'loading' value to 'idle'.
src/page/AddCar.js:
import { Col, Container, Form, Row ,Button} from "react-bootstrap";
import { Controller, useForm } from "react-hook-form";
import { useDispatch, useSelector } from "react-redux";
import { getLoading, saveNewCar } from "../features/cars/carslice";
import { useNavigate } from "react-router-dom";

const AddCar = () => {
  const { control, handleSubmit } = useForm({
    defaultValues: {
      name: "",
      year: "",
      imageUrl: "",
    },
  });

  const disptach = useDispatch();
  const navigate = useNavigate();
  const apiStatus = useSelector(getLoading);

  const createNewCar = (data) => {
    let payload = {
      name: data.name,
      year: Number(data.year),
      imageUrl: data.imageUrl,
    };
    disptach(saveNewCar(payload))
      .unwrap()
      .then(() => {
        navigate("/");
      });
  };
  return (
    <>
      <Container className="mt-2">
        <Row>
          <Col className="col-md-8 offset-md-2">
            <legend>Create A New Car</legend>
            <Form onSubmit={handleSubmit(createNewCar)}>
              <Form.Group className="mb-3" controlId="formName">
                <Form.Label>Name</Form.Label>
                <Controller
                  control={control}
                  name="name"
                  render={({ field }) => (
                    <Form.Control type="text" {...field} />
                  )}
                />
              </Form.Group>
              <Form.Group className="mb-3" controlId="formModelYear">
                <Form.Label>Model Year</Form.Label>
                <Controller
                  control={control}
                  name="year"
                  render={({ field }) => (
                    <Form.Control type="text" {...field} />
                  )}
                />
              </Form.Group>
              <Form.Group className="mb-3" controlId="formImgUr">
                <Form.Label>Image URL</Form.Label>
                <Controller
                  control={control}
                  name="imageUrl"
                  render={({ field }) => (
                    <Form.Control type="text" {...field} />
                  )}
                />
              </Form.Group>
              <Button variant="dark" type="submit" disabled={apiStatus === "pending"}>
                {apiStatus === "pending"? "Saving.........": "Save"}
              </Button>
            </Form>
          </Col>
        </Row>
      </Container>
    </>
  );
};

export default AddCar;
- (Line: 8-14) Defined the react hook form with the default form field values.
- (Line: 16) Defined the 'useDispatch' that load from the 'react-redux'.
- (Line: 17) Defined the 'useNavigate' that load form the 'react-router-dom'
- (Line: 18) Using 'getLoading' selector fetching the 'loading' property value from the store.
- (Line: 20-31) Form submission method.
- (Line: 26-30) Here dispatching the 'saveNewCar' action of our redux-thunk. After completion of API call and creating new item then navigating back to home page.
- (Line: 38-68) Defined our react-bootstrap form fields and they are integrated with our react hook form configurations.
- (Line: 69-71) Here based on API status we are disabling the button to avoid unnecessary button clicks.
src/pages/AllCars.js:
// existing code hidden for display purpose
import { useNavigate } from "react-router-dom";

const AllCars = () => {
  const navigate = useNavigate();

  return (
    <Container className="mt-2">
      <Row>
        <Col className="col-md-4 offset-md-4">
          <Button variant="dark"  type="button" onClick={() => {navigate("/add-car")}}>Add New Car</Button>
        </Col>
      </Row>
      <Row>{contentToRender}</Row>
    </Container>
  );
};

export default AllCars;
(Step 1)(Step 3)
Create React Component 'EditCar':
Let's create a new React Component like 'EditCar' in the 'pages' folder.
src/pages/EditCar.js:
const EditCar = () => {
  return <></>;
};
export default EditCar;
Configure the route for the 'EditCar' component in the 'App' Component.src/App.js:
import logo from "./logo.svg";
import "./App.css";
import Layout from "./components/shared/Layout";
import { Route, Routes } from "react-router-dom";
import AllCars from "./pages/AllCars";
import AddCar from "./pages/AddCar";
import EditCar from "./pages/EditCar";

function App() {
  return (
    <>
      <Layout>
        <Routes>
          <Route path="/" element={<AllCars />}></Route>
          <Route path="/add-car" element={<AddCar />}></Route>
          <Route path="/edit-car/:id" element={<EditCar />}></Route>
        </Routes>
      </Layout>
    </>
  );
}
export default App;
Implement Update Operation:
Now let's create redux-thunk to invoke the update API call.src/features/cars/carslice.js:
import axios from "axios";

const { createSlice, createAsyncThunk } = require("@reduxjs/toolkit");

export const fetchALLCars = createAsyncThunk("cars/getAPI", async () => {
  const response = await axios.get("http://localhost:4000/cars");
  return response.data;
});

export const saveNewCar = createAsyncThunk(
  "cars/createAPI",
  async (payload) => {
    const response = await axios.post("http://localhost:4000/cars", payload);
    return response.data;
  }
);

export const updateCar = createAsyncThunk("cars/updateAPI", async (payload) => {
  const response = await axios.put(
    `http://localhost:4000/cars/${payload.id}`,
    payload
  );
  return response.data;
});

const initialState = {
  carsData: [],
  loading: "idle",
};

const carslice = createSlice({
  name: "cars",
  initialState,
  reducers: {},
  extraReducers: (builder) => {
    builder.addCase(fetchALLCars.pending, (state, action) => {
      state.loading = "pending";
    });
    builder.addCase(fetchALLCars.fulfilled, (state, action) => {
      state.loading = "idle";
      state.carsData = action.payload;
    });
    builder.addCase(saveNewCar.pending, (state, action) => {
      state.loading = "pending";
    });
    builder.addCase(saveNewCar.fulfilled, (state, action) => {
      state.loading = "idle";
      state.carsData.unshift(action.payload);
    });
    builder.addCase(updateCar.pending, (state) => {
      state.loading = "pending";
    });
    builder.addCase(updateCar.fulfilled, (state, action) => {
      state.loading = "idle";
      state.carsData = state.carsData.filter((_) => _.id !== action.payload.id);
      state.carsData.unshift(action.payload);
    });
  },
});

export const getAllCars = (state) => state.car.carsData;
export const getLoading = (state) => state.car.loading;
export const getCarById = (id) => {
  return (state) => state.car.carsData.filter((_) => _.id === id)[0];
};
export default carslice.reducer;
- (Line: 18-24) The Redux-Thunk invokes the HTTP PUT API call.
- (Line: 50-52) The 'updateCar.pending' invoked based on our HTTP PUT API call status.
- (Line: 53-57) The 'updateCar.fulfilled' invoked on the success of the HTTP PUT API call. Here we remove the existing item from the 'state.carData' and then push the updated value into the 'state.carsData'.
- (Line: 63-65) Created a new selector like 'getCarById'. This selector helps to populate the data onto the edit form.
src/pages/EditCar.js:
import { Col, Container, Form, Row, Button } from "react-bootstrap";
import { Controller, useForm } from "react-hook-form";
import { useDispatch, useSelector } from "react-redux";
import {
  getCarById,
  getLoading,
  saveNewCar,
  updateCar,
} from "../features/cars/carslice";
import { useNavigate, useParams } from "react-router-dom";

const EditCar = () => {
  const { id } = useParams();
  const itemToEdit = useSelector(getCarById(Number(id)));
  const { control, handleSubmit } = useForm({
    defaultValues: {
      name: itemToEdit.name,
      year: itemToEdit.year,
      imageUrl: itemToEdit.imageUrl,
    },
  });

  const disptach = useDispatch();
  const navigate = useNavigate();
  const apiStatus = useSelector(getLoading);

  const updateCarForm = (data) => {
    let payload = {
      id: Number(id),
      name: data.name,
      year: Number(data.year),
      imageUrl: data.imageUrl,
    };
    disptach(updateCar(payload))
      .unwrap()
      .then(() => {
        navigate("/");
      });
  };

  return (
    <>
      <Container className="mt-2">
        <Row>
          <Col className="col-md-8 offset-md-2">
            <legend>Update A New Car</legend>
            <Form onSubmit={handleSubmit(updateCarForm)}>
              <Form.Group className="mb-3" controlId="formName">
                <Form.Label>Name</Form.Label>
                <Controller
                  control={control}
                  name="name"
                  render={({ field }) => (
                    <Form.Control type="text" {...field} />
                  )}
                />
              </Form.Group>
              <Form.Group className="mb-3" controlId="formModelYear">
                <Form.Label>Model Year</Form.Label>
                <Controller
                  control={control}
                  name="year"
                  render={({ field }) => (
                    <Form.Control type="text" {...field} />
                  )}
                />
              </Form.Group>
              <Form.Group className="mb-3" controlId="formImgUr">
                <Form.Label>Image URL</Form.Label>
                <Controller
                  control={control}
                  name="imageUrl"
                  render={({ field }) => (
                    <Form.Control type="text" {...field} />
                  )}
                />
              </Form.Group>
              <Button
                variant="dark"
                type="submit"
                disabled={apiStatus === "pending"}
              >
                {apiStatus === "pending" ? "Updating........." : "Update"}
              </Button>
            </Form>
          </Col>
        </Row>
      </Container>
    </>
  );
};
export default EditCar;
- (Line: 13) Read the 'id' value from the route using the 'useParams()'.
- (Line: 14) Fetch the item to edit from the store using the 'getCarById' selector.
- (Line: 15-21) Initialize the form by using our store data as the initial values.
- (Line: 27-39) The 'updateCarForm' method gets executed on submitting the edit form.
- (Line: 34-38) The 'updateCar' thunk redux dispatched on the success of PUT API we will navigate back to the home page.
src/pages/AllCars.js:
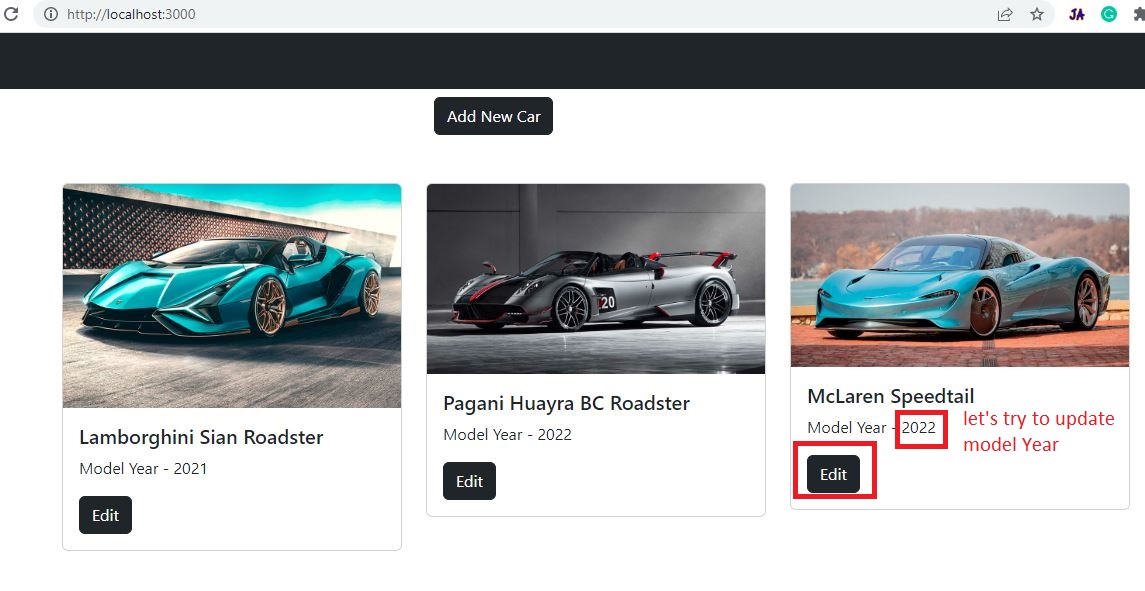
<Row xs={1} md={3} className="g-4">
  {allCars.map((car) => (
	<Col key={car.id}>
	  <Card>
		<Card.Img variant="top" src={car.imageUrl} />
		<Card.Body>
		  <Card.Title>{car.name}</Card.Title>
		  <Card.Text>Model Year - {car.year}</Card.Text>
		  <Button
			variant="dark"
			type="button"
			onClick={() => {
			  navigate(`/edit-car/${car.id}`);
			}}
		  >
			Edit
		  </Button>
		</Card.Body>
	  </Card>
	</Col>
  ))}
</Row>
- (Line: 9-17) Configure the 'Edit' button, on clicking it navigates to the edit form.
(Step 2)
(Step 3)
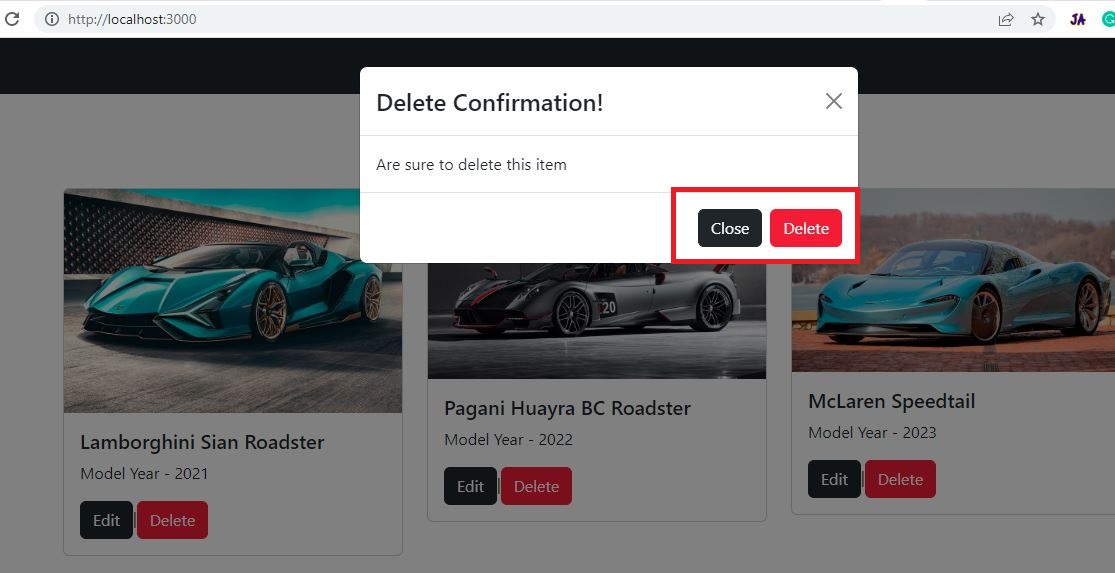
Create React Component 'DeleteConfirmation':
Let's create a shared React Component like 'DeleteConfirmation' in the 'components/shared' folder.
components/shared/DeleteConfirmation.js:
import Button from "react-bootstrap/Button";
import Modal from "react-bootstrap/Modal";
const DeleteConfirmation = (props) => {
  return (
    <>
      <Modal
        show={props.showModal}
        onHide={() => {
          props.hideDeleteModalHandler();
        }}
      >
        <Modal.Header closeButton>
          <Modal.Title>{props.title}</Modal.Title>
        </Modal.Header>
        <Modal.Body>{props.body}</Modal.Body>
        <Modal.Footer>
          <Button
            variant="dark"
            onClick={() => {
              props.hideDeleteModalHandler();
            }}
          >
            Close
          </Button>
          <Button
            variant="danger"
            onClick={() => {
              props.confirmDeleteModalHandler();
            }}
            disabled={props.apiStatus === "pending"}
          >
            {props.apiStatus === "pending" ? "Deleting......" : "Delete"}
          </Button>
        </Modal.Footer>
      </Modal>
    </>
  );
};
export default DeleteConfirmation;
- (Line: 9&20) The 'hideDeleteModalHander()' method helps to close the Modal. This method logic comes from the parent component.
- (Line: 28) The 'confirmDeleteModalHandler()' method helps to invoke delete API call.
Implement Delete Operation:
Let's focus on implementing the 'Delete' operation.
Now let's implement redux-thunk middle logic for the HTTP DELETE API call.
src/features/cars/carslice.js:
import axios from "axios";
const { createSlice, createAsyncThunk } = require("@reduxjs/toolkit");
export const fetchALLCars = createAsyncThunk("cars/getAPI", async () => {
const response = await axios.get("http://localhost:4000/cars");
return response.data;
});
export const saveNewCar = createAsyncThunk(
"cars/createAPI",
async (payload) => {
const response = await axios.post("http://localhost:4000/cars", payload);
return response.data;
}
);
export const updateCar = createAsyncThunk("cars/updateAPI", async (payload) => {
const response = await axios.put(
`http://localhost:4000/cars/${payload.id}`,
payload
);
return response.data;
});
export const deleteCar = createAsyncThunk("cars/deleteAPI", async (id) => {
const response = await axios.delete(`http://localhost:4000/cars/${id}`);
return id;
});
const initialState = {
carsData: [],
loading: "idle",
};
const carslice = createSlice({
name: "cars",
initialState,
reducers: {},
extraReducers: (builder) => {
builder.addCase(fetchALLCars.pending, (state, action) => {
state.loading = "pending";
});
builder.addCase(fetchALLCars.fulfilled, (state, action) => {
state.loading = "idle";
state.carsData = action.payload;
});
builder.addCase(saveNewCar.pending, (state, action) => {
state.loading = "pending";
});
builder.addCase(saveNewCar.fulfilled, (state, action) => {
state.loading = "idle";
state.carsData.unshift(action.payload);
});
builder.addCase(updateCar.pending, (state) => {
state.loading = "pending";
});
builder.addCase(updateCar.fulfilled, (state, action) => {
state.loading = "idle";
state.carsData = state.carsData.filter((_) => _.id !== action.payload.id);
state.carsData.unshift(action.payload);
});
builder.addCase(deleteCar.pending, (state) => {
state.loading = "pending";
});
builder.addCase(deleteCar.fulfilled, (state, action) => {
state.loading = "idle";
state.carsData = state.carsData.filter((_) => _.id !== action.payload);
});
},
});
export const getAllCars = (state) => state.car.carsData;
export const getLoading = (state) => state.car.loading;
export const getCarById = (id) => {
return (state) => state.car.carsData.filter((_) => _.id === id)[0];
};
export default carslice.reducer;
- (Line: 26-29) Implemented the redux-thunk for invoking the delete API call.
- (Line: 63-69) Implemented our redux-thunk state action like 'pending' and 'fulfilled'. In the 'fufilled' state remove our deleted item from the store.
src/pages/AllCars.js:
import axios from "axios";

import Card from "react-bootstrap/Card";
import Col from "react-bootstrap/Col";
import Row from "react-bootstrap/Row";
import Spinner from "react-bootstrap/Spinner";
import { useEffect, useState } from "react";
import { useDispatch, useSelector } from "react-redux";
import {
  deleteCar,
  fetchALLCars,
  getAllCars,
  getLoading,
} from "../features/cars/carslice";
import { Button, Container } from "react-bootstrap";
import { useNavigate } from "react-router-dom";
import DeleteConfirmation from "../components/shared/DeleteConfirmation";

const AllCars = () => {
  const allCars = useSelector(getAllCars);
  const apiStatus = useSelector(getLoading);
  const dispatch = useDispatch();
  let contentToRender = "";
  const navigate = useNavigate();
  const [itemToDeleteId, setItemToDeleteId] = useState(0);
  const [showModal, setShowModal] = useState(false);

  useEffect(() => {
    if (allCars.length == 0) {
      dispatch(fetchALLCars());
    }
  }, [dispatch]);

  const openDeleteModalHandler = (id) => {
    setShowModal(true);
    setItemToDeleteId(id);
  };

  const hideDeleteModalHandler = () => {
    setShowModal(false);
    setItemToDeleteId(0);
  };

  const confirmDeleteModalHandler = () => {
    dispatch(deleteCar(itemToDeleteId))
      .unwrap()
      .then(() => {
        setShowModal(false);
        setItemToDeleteId(0);
      });
  };

  contentToRender =
    apiStatus === "pending" ? (
      <>
        <div className=" d-flex align-items-center justify-content-center">
          <Spinner animation="border" role="status">
            <span className="visually-hidden">Loading...</span>
          </Spinner>
        </div>
      </>
    ) : (
      <>
        <Row xs={1} md={3} className="g-4">
          {allCars.map((car) => (
            <Col key={car.id}>
              <Card>
                <Card.Img variant="top" src={car.imageUrl} />
                <Card.Body>
                  <Card.Title>{car.name}</Card.Title>
                  <Card.Text>Model Year - {car.year}</Card.Text>
                  <Button
                    variant="dark"
                    type="button"
                    onClick={() => {
                      navigate(`/edit-car/${car.id}`);
                    }}
                  >
                    Edit
                  </Button>
                  |
                  <Button
                    variant="danger"
                    type="button"
                    onClick={() => {
                      openDeleteModalHandler(car.id);
                    }}
                  >
                    Delete
                  </Button>
                </Card.Body>
              </Card>
            </Col>
          ))}
        </Row>
      </>
    );

  return (
    <>
      <DeleteConfirmation
        title="Delete Confirmation!"
        body="Are sure to delete this item"
        showModal={showModal}
        apiStatus={apiStatus}
        hideDeleteModalHandler={hideDeleteModalHandler}
        confirmDeleteModalHandler={confirmDeleteModalHandler}
      ></DeleteConfirmation>
      <Container className="mt-2">
        <Row>
          <Col className="col-md-4 offset-md-4">
            <Button
              variant="dark"
              type="button"
              onClick={() => {
                navigate("/add-car");
              }}
            >
              Add New Car
            </Button>
          </Col>
        </Row>
        <Row>{contentToRender}</Row>
      </Container>
    </>
  );
};
export default AllCars;
- (Line: 25) The 'itemToDeleteId' state variable holds the item to be deleted.
- (Line: 26) The 'showModal' state variable is to hide and show the React Bootstrap Modal.
- (Line: 34-37) The 'openDeleteModalHandler' function to open delete confirmation modal.
- (Line: 39-42) The 'hideDeleteModalHandler' function to close the confirmation modal.
- (Line: 44-51) The 'confirmDeleteModalHandler' function invokes the delete API call through 'deleteCar' redux-thunk middleware.
- (Line: 82-90) Add the 'Delete' button on clicking it opens the delete confirmation Modal.
Video Session:
Wrapping Up:
Hopefully, I think this article delivered some useful information on the React JS(v18) State Management using Redux Toolkit. I love to have your feedback, suggestions, and better techniques in the comment section below.
%20%20redux%20toolkit%20%20state%20management%20%20crud%20example.png)
-2.jpg)






Comments
Post a Comment