In this article, we will implement google authentication for the Blazor WebAssembly Standalone application. The Standalone app defines we directly implement authentication on Blazor WebAssembly without using dependent API for authentication.
Step3:
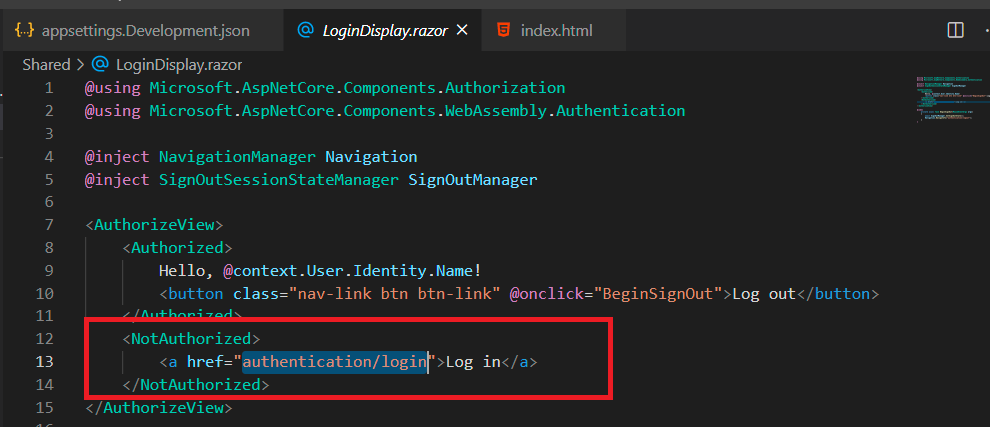
Login button configured with path "authentication/login" in 'LoginDisplay' component.
Step6:
This Google authentication will be 3 parts series:
- Part-1(Current article) Create a Blazor WebAssembly application with individual authentication enabled and then configure with google authentication.
- Part-2 Register the users into our application database who log in to our application using a google account. Also, generate JWT authentication to consume secured API.
- Part-3 (Totally Optional article) Integrate google authentication into the existing Blazor WebAssembly application(an application that is created without enabling individual authentication).
Create A Blazor WebAssembly App With Authentication:
Let's begin our demo by creating the Blazor Web Assembly application by enabling the individual authentication option while selecting the Blazor Web Assembly template.
Run the application we can observe the login button on the menu.
Register Blazor Application In Google API's Console:
Step1:
Create an account in Google API's Console(https://console.cloud.google.com/apis/dashboard).
Step2:
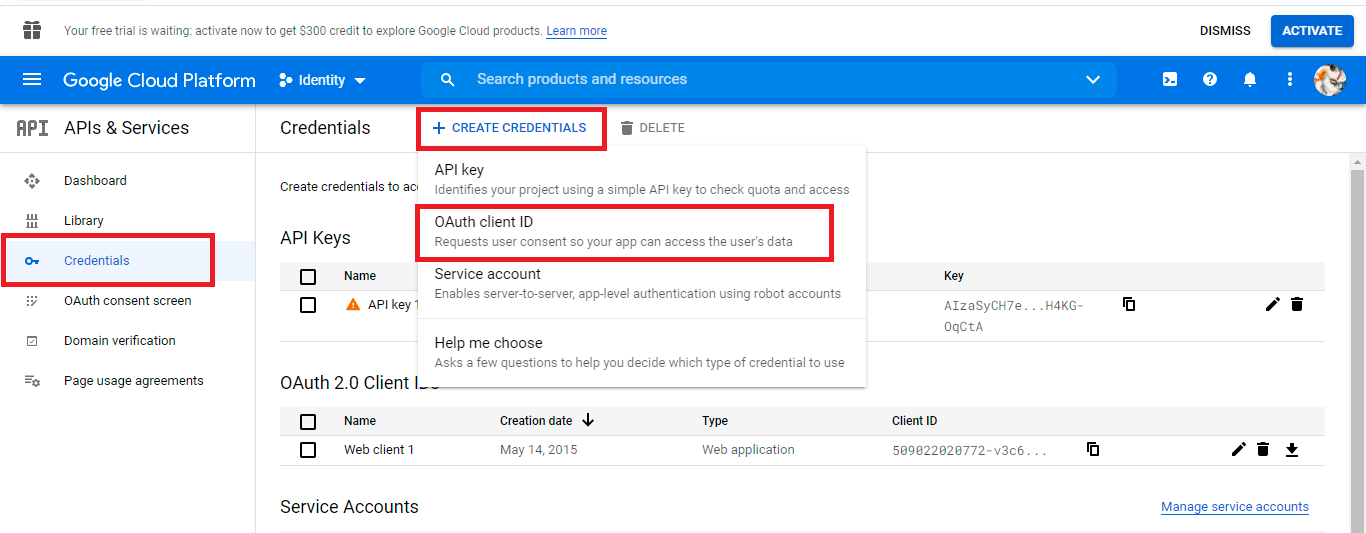
Select the 'Credentials' menu and then click on 'Create Credentials'options and then select 'OAuth Client ID'.
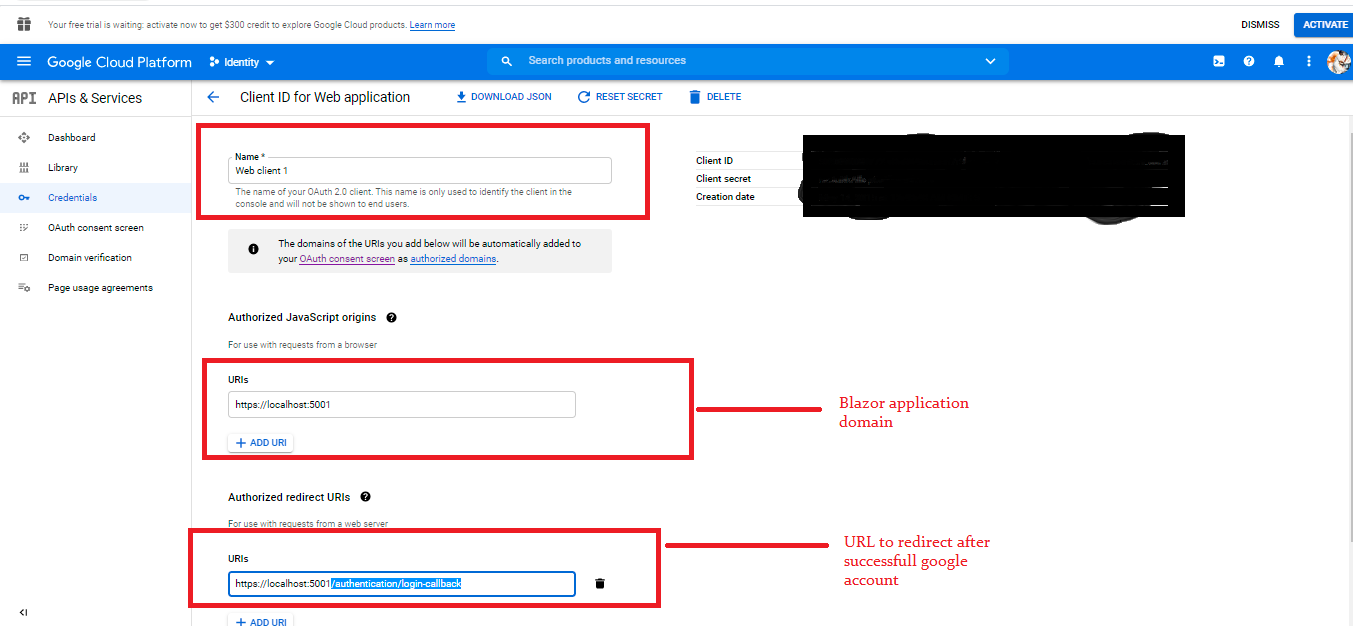
Register our application here:
- Create a name for our application.
- Then register our blazor web assembly application domain.
- Then register login callback URL.(its path should be fixed like '/authentication/login-callback', so these URL's automatically defined by our blazor application). So how to define our custom paths will be explained in part-3 article.
Step4:
Now download the JSON file for settings that we need to configure in our Blazor Web Assembly application.
Configure Settings In Blazor WebAssembly Application:
Now in the app settings file in 'wwwroot' folder need to configure the following settings:
- Authority - value should be a domain. So for google authentication, its value should be "https://accounts.google.com/".
- ClientId - its value copy from the downloaded JSON file from google console.
- PostLogoutRedirectUri - its default path should be '/authentication/logout-callback'. Application will be redirect to this path on clicking logout.
- RedirectUri - its default path should be '/authentication/login-callback'. This path should match with the google registered path value. This path used to redirect applications on redirect.
- ResponseType - its value should be 'id_token'.
wwwroot/appsettings.Development.json:
{
  "Local": {
    "Authority": "https://accounts.google.com/",
    "ClientId": "your_google_console_clientId",
    "PostLogoutRedirectUri": "https://localhost:5001/authentication/logout-callback",
    "RedirectUri": "https://localhost:5001/authentication/login-callback",
    "ResponseType": "id_token"
  }
}
That's all adding code to our project. All upcoming steps we will see are key functions that are autogenerated blazor web assembly template.
OpenID Connect(OIDC):
The default identity provider used by the Blazor WebAssembly application is OpenID Connect. So this configuration automatically established in 'Program.cs' file.
Program.cs:
builder.Services.AddOidcAuthentication(options =>
{
	// Configure your authentication provider options here.
	// For more information, see https://aka.ms/blazor-standalone-auth
	builder.Configuration.Bind("Local", options.ProviderOptions);
});
AuthenticationService.js File:
Few OIDC logics will be handled by the 'AuthenticationService.js' file which reference is automatically added in the index.html
wwwroot/index.html:
Login Flow:
Step1:Login button configured with path "authentication/login" in 'LoginDisplay' component.
Shared/LoginDisplay.razor:
On clicking the log-in button, it will go to the 'Authentication' component.
Pages/Authentication.razor:
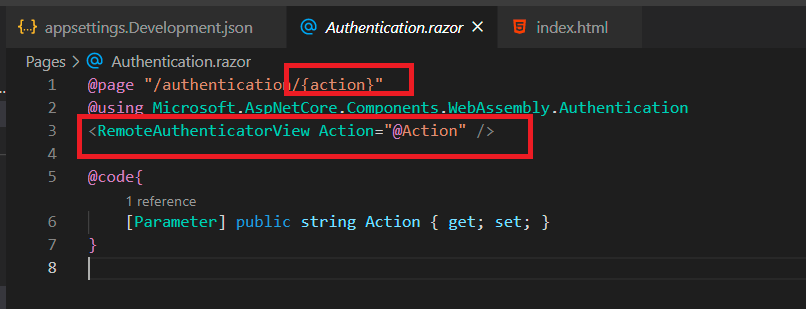
Any login-related path will come to the 'Authentication' component. So based on the 'action' value appropriate functionality will be executed with the help of 'AuthenticationService.js'.
Step3:
Now AuthenticationService.js file with help of the blazor framework will prepare the Url for google authentication.
Step4:
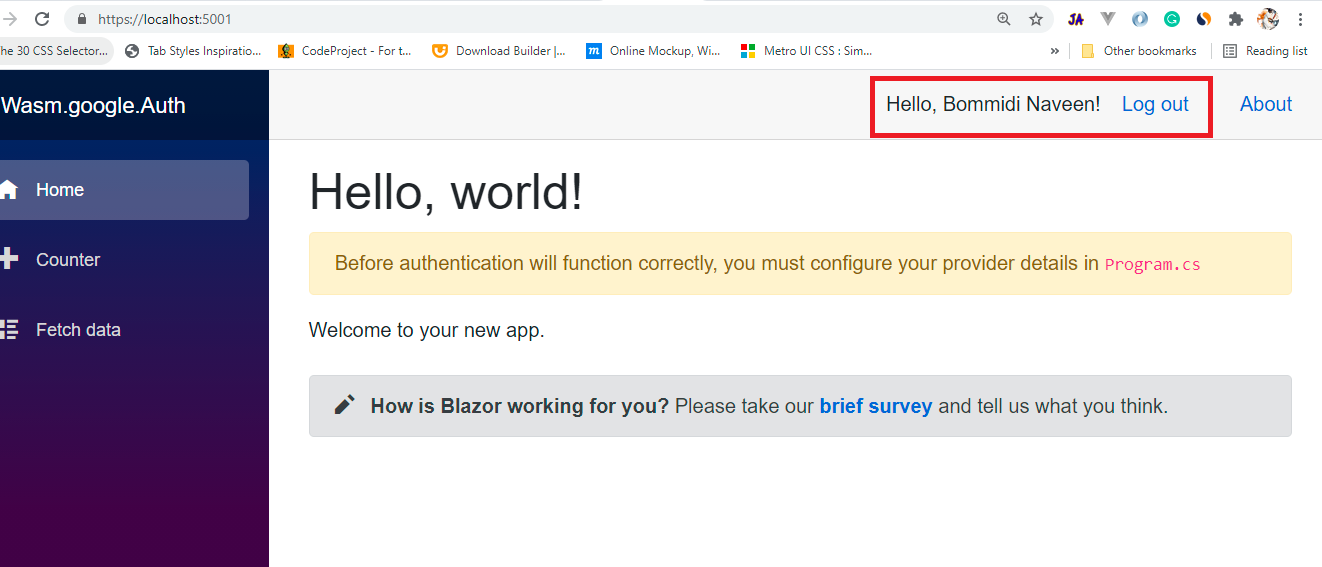
On the success of google account authentication, google will redirect us to our blazor application with the access token in the URL. Google uses the URL we registered inside of it like '/authentication/login-callback'.
Step5:
It is very hard to observe the access token in the URL. Because 'AuthenticationService.js' will read the token and makes our application authenticate and redirect back to the home page immediately.
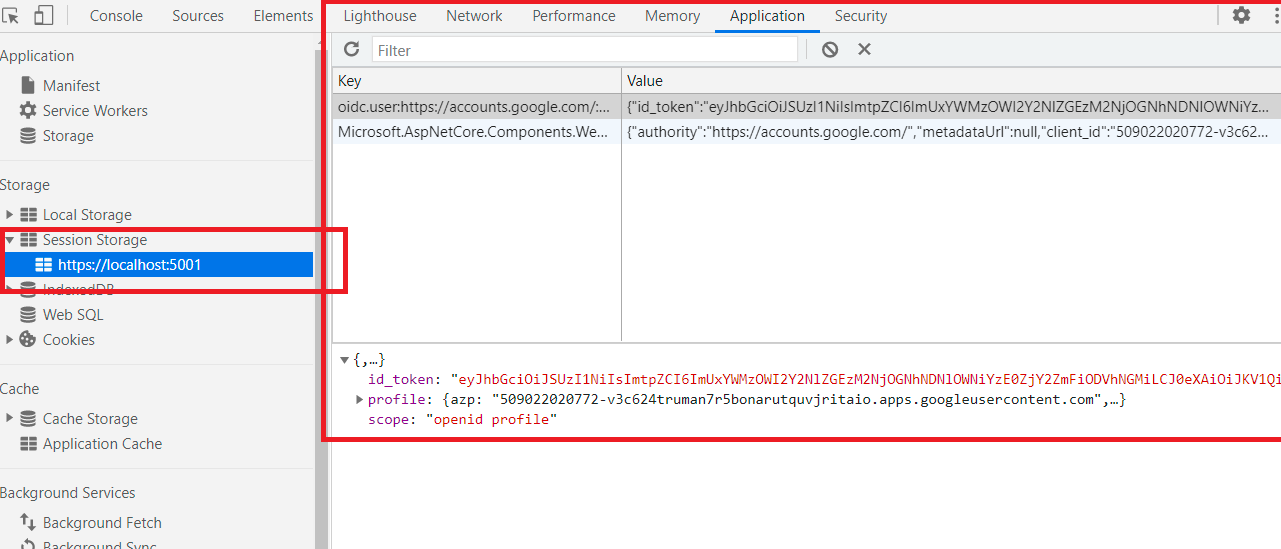
Framework stores the access token and user information in browser session storage.
Logout Flow:
Application logout enabled in the 'LoginDisplay' component.
Shared/LoginDisapy.razor:
In the 'BeginSinOut' method, it navigates to the 'Authentication' component, and from there based on action (eg: logout from the above picture) 'AuthenticationService.js' clears all login-related stuff and makes user logout successful.
That's all about the simple example on blazor webassembly standalone application login using google account.
Video Session:
Support Me!
Buy Me A Coffee
PayPal Me
Wrapping Up:
Hopefully, I think this article delivered some useful information about Google Authentication in Blazore WebAssembly Standalone Application. I love to have your feedback, suggestions, and better techniques in the comment section below.





Hi Naveen,
ReplyDeletethanks a lot for your tutorials. They are a great help :)
I want to add Google and Microsoft login to my application. Is it possible to add more than one identity provider?